之前做运维工作使用centos5、6、7的时候通过pxe网络启动安装系统,配置起来比较繁琐(后面也都写成脚本的方式),无意中看到iVentoy工具就测试了一下,还是挺好用的 。
更多信息请参见iVentoy
1、工具*载下**
*载下**地址:Download . Ventoy (iventoy.com)
我是在虚拟环境中测试的,刚好有centos的虚机,就*载下**了iventoy-1.0.19-linux-free.tar.gz 。
2、解压并上传镜像
tar zxvf iventoy-1.0.19-linux-free.tar.gz
cd iventoy-1.0.19
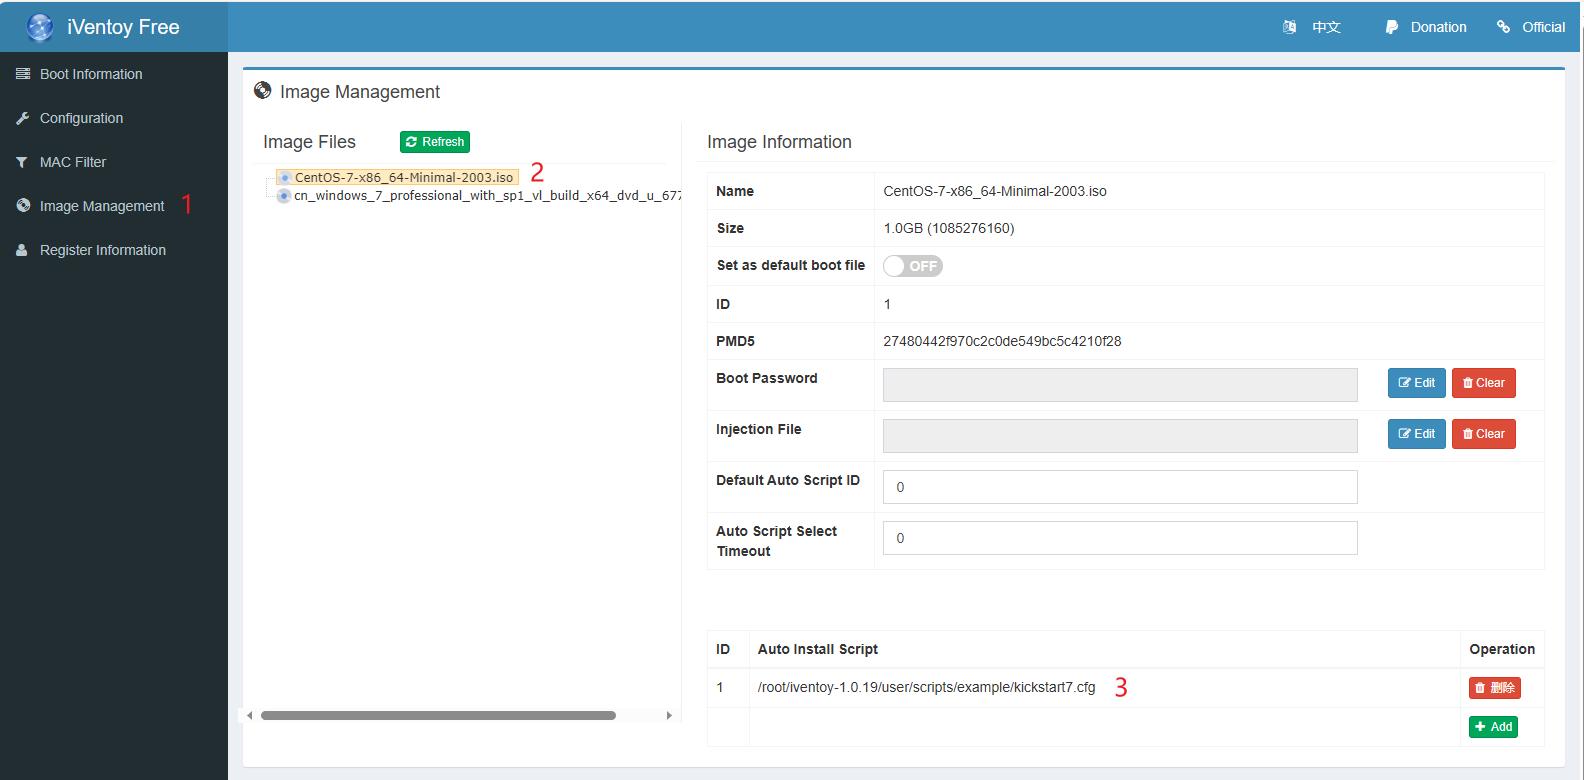
上传CentOS-7-x86_64-Minimal-2003.iso镜像到iso目录
3、启动和配置
 [root@ceph-101-230 iventoy-1.0.19]# ./iventoy.sh  start
 iventoy start SUCCESS PID=482656

 Please open your browser and visit http://127.0.0.1:26000 or http://x.x.x.x:26000 (x.x.x.x is any valid IP address)
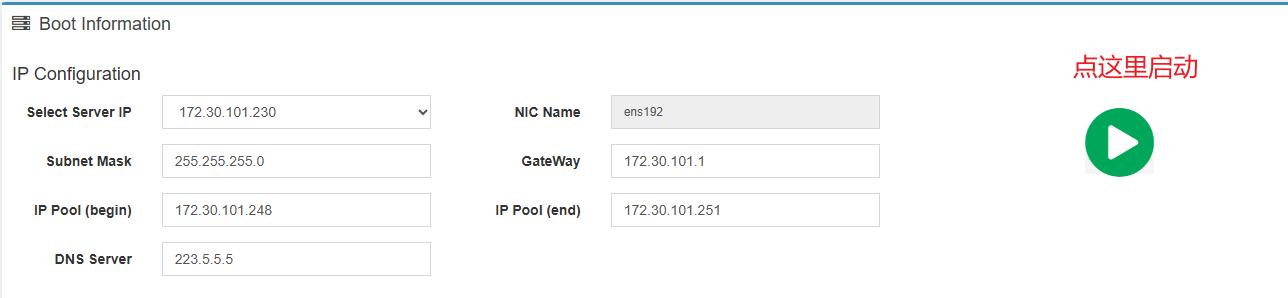
Boot information 网络和dhcp地址池配置
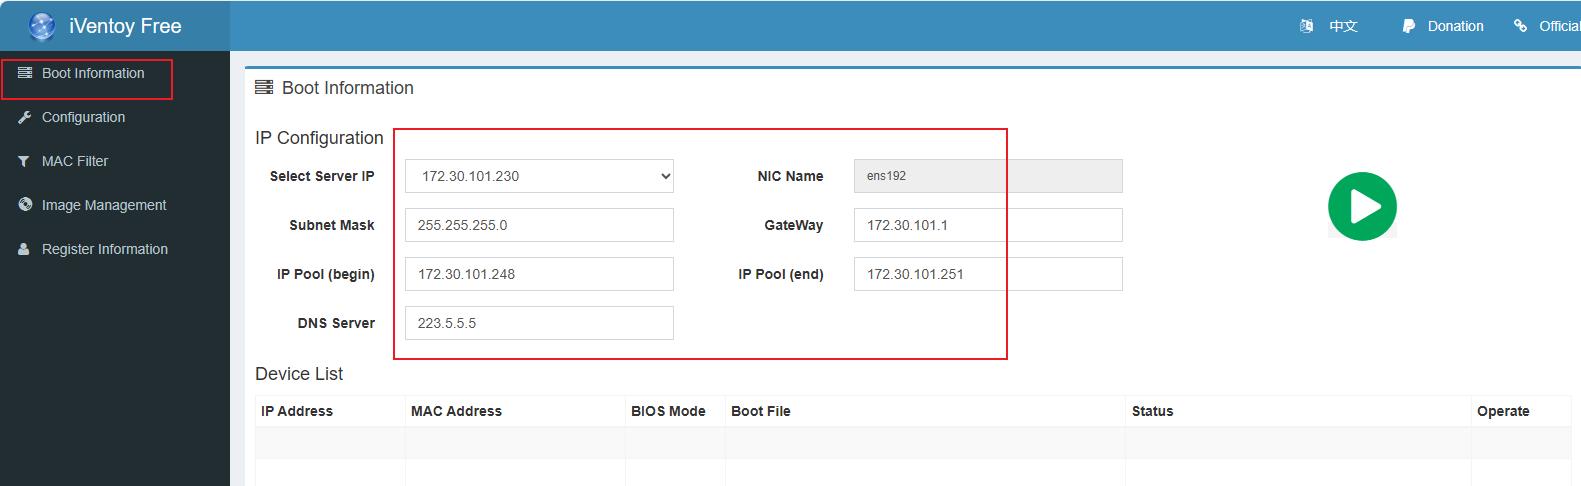
Image Management 安装镜像和自动应答文件
启动服务
应答文件样例
 install

 lang en_US.UTF-8
 keyboard us
 rootpw 12344321
 #rootpw  --iscrypted $1$aATMDWLL$IzgPj/Y.Nke.ioQPJNbtj.
 #firewall --service=ssh
 firewall --disabled
 selinux --disable
 authconfig --enableshadow --passalgo=sha512
 text
 timezone --utc Asia/Shanghai
 skipx

 #network --onboot=yes --device=$VT_MAC_COLON_LOWER$ --bootproto=static --ip=$VT_LOCAL_IP$ --netmask=$VT_NET_MASK$ --gateway=$VT_GATEWAY$ --noipv6

 eula --agreed
 firstboot --disable

 %include /tmp/partation.ks
 zerombr

 ## 分区相关
 clearpart --all
 #autopart --type=plain

 #part /boot --fstype="xfs" --size=1024
 #part swap  --fstype="swap" --size=4096
 #part /     --fstype="xfs" --grow --size=1

 #使用lvm管理磁盘分区

 part /boot --fstype xfs --size=1024
 part swap --size=4096
 part pv.01  --grow --size=0
 volgroup VolGroup00 --pesize=32768  pv.01
 logvol / --fstype xfs --name=LogVol00 --vgname=VolGroup00 --grow --size=1


 #packages configuration
 %packages
 @core
 %end

 reboot

 %pre

 #Select install disk
 disk_short_name=$VT_LINUX_DISK_MAX_SIZE$

 echo bootloader --location=mbr --driveorder=$disk_short_name >> /tmp/partation.ks
 echo ignoredisk --only-use=$disk_short_name  >> /tmp/partation.ks
 echo clearpart --all --initlabel --drives=$disk_short_name  >> /tmp/partation.ks

 %end

 #Download third part software
 %post

 # wget $VT_IMG_ID_HTTP_URL$/Packages/kernel-tools-3.10.0-957.el7.x86_64.rpm -O /root/kernel-tools.rpm
 # wget http://$VT_SERVER_IP$:$VT_HTTP_PORT$/user/xxx.zip -O /root/xxx.zip

 ##关闭防火墙、selinux
 sed -i 's/SELINUX=enforcing/SELINUX=disabled/g' /etc/selinux/config
 setenforce 0
 systemctl disable firewalld.service
 systemctl stop firewalld.service

 ##禁止ctrl+alt+delete重启机器
 cat /etc/redhat-release | grep 'release 7' && rm -f /usr/lib/systemd/system/ctrl-alt-del.target

 ##修改时区
 timedatectl set-local-rtc 0
 timedatectl set-timezone Asia/Shanghai
 localectl set-locale LANG=en_US.UTF-8

 ##内核优化
 grep -q "hard nofile 102400" /etc/security/limits.conf || echo "* hard nofile 102400" >> /etc/security/limits.conf
 grep -q "soft nofile 102400" /etc/security/limits.conf || echo "* soft nofile 102400" >> /etc/security/limits.conf
 grep -q "hard nproc  102400" /etc/security/limits.conf || echo "* hard nproc  102400" >> /etc/security/limits.conf
 grep -q "soft nproc  102400" /etc/security/limits.conf || echo "* soft nproc  102400" >> /etc/security/limits.conf
 sed -i -e 's/^#DefaultLimitNOFILE=/DefaultLimitNOFILE=102400/' /etc/systemd/system.conf
 rm -f /etc/security/limits.d/*.conf

 \mv -f /etc/sysctl.conf /etc/sysctl.conf.bak
 cat >>/etc/sysctl.conf<<EOF
 net.ipv4.ip_forward = 1
 net.ipv4.conf.default.rp_filter = 1
 net.ipv4.conf.default.accept_source_route = 0
 kernel.sysrq = 0
 kernel.core_uses_pid = 1
 net.ipv4.tcp_syncookies = 1
 kernel.msgmnb = 65536
 kernel.msgmax = 65536
 kernel.shmmax = 68719476736
 kernel.shmall = 4294967296
 net.ipv4.tcp_max_tw_buckets = 160000
 net.ipv4.tcp_sack = 1
 net.ipv4.tcp_window_scaling = 1
 net.ipv4.tcp_rmem = 4096 87380 8388608
 net.ipv4.tcp_wmem = 4096 65536 8388608
 net.core.wmem_default = 8388608
 net.core.rmem_default = 8388608
 net.core.rmem_max = 16777216
 net.core.wmem_max = 16777216
 net.core.netdev_max_backlog = 262144
 net.ipv4.tcp_max_orphans = 3276800
 net.ipv4.tcp_max_syn_backlog = 262144
 net.ipv4.tcp_timestamps = 0
 net.ipv4.tcp_synack_retries = 1
 net.ipv4.tcp_syn_retries = 1
 net.ipv4.tcp_tw_recycle = 1
 net.ipv4.tcp_tw_reuse = 1
 net.ipv4.tcp_mem = 94500000 915000000 927000000
 net.ipv4.tcp_fin_timeout = 30
 net.ipv4.tcp_keepalive_time = 30
 net.ipv4.ip_local_port_range = 1024 65000
 fs.file-max = 102400
 vm.swappiness = 10
 EOF

 ##安装常用工具
 echo 'nameserver 223.5.5.5' >>/etc/resolv.conf
 yum -y install wget bash-completion vim-enhanced
 yum -y install lrzsz net-snmp net-tools sysstat ntp chrony

 ##设置chronyd,使用阿里的时间源
 sed -i -e 's/0.centos.pool.ntp.org/time1.aliyun.com/g' -e 's/1.centos.pool.ntp.org/time2.aliyun.com/g' /etc/chrony.conf
 systemctl enable chronyd.service
 systemctl start chronyd.service

 ##关闭邮局组件
 systemctl disable postfix.service
 systemctl stop postfix

 ##关闭NetworkManager
 systemctl disable NetworkManager
 systemctl stop NetworkManager

 ## 关闭ssh登录时的名称解析、加快登录速度
 sed -i 's/#UseDNS yes/UseDNS no/' /etc/ssh/sshd_config && systemctl restart sshd

 %end
4、安装过程
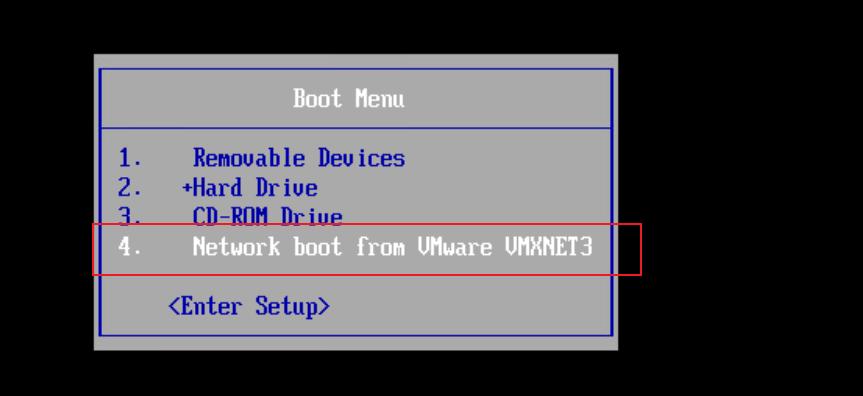
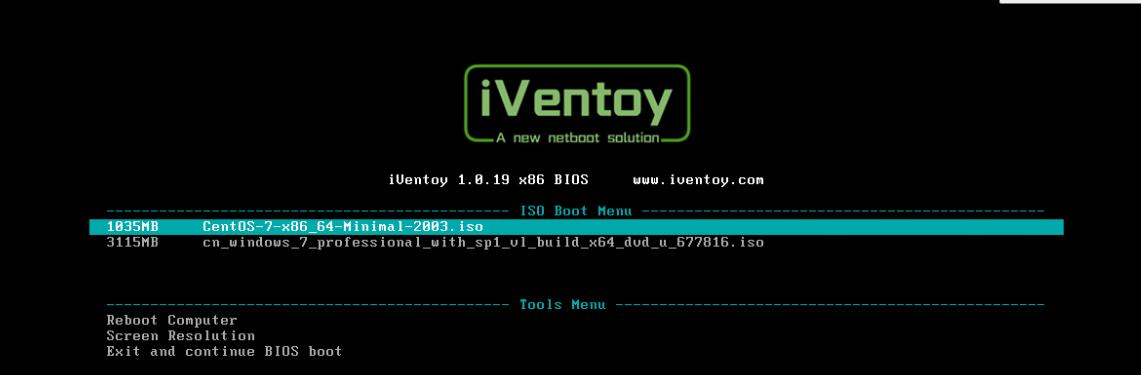
pxe网卡启动
选择安装镜像
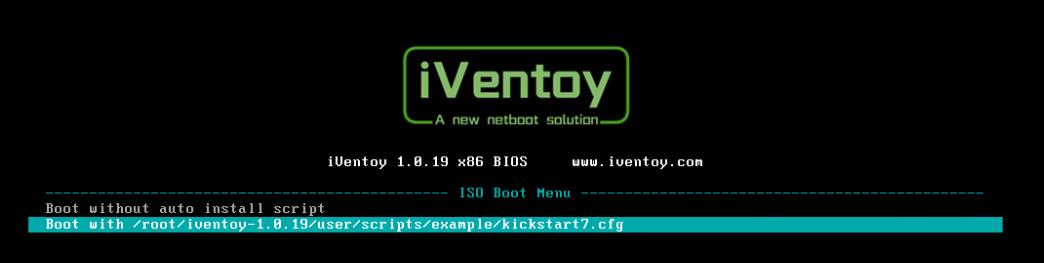
选择应答文件
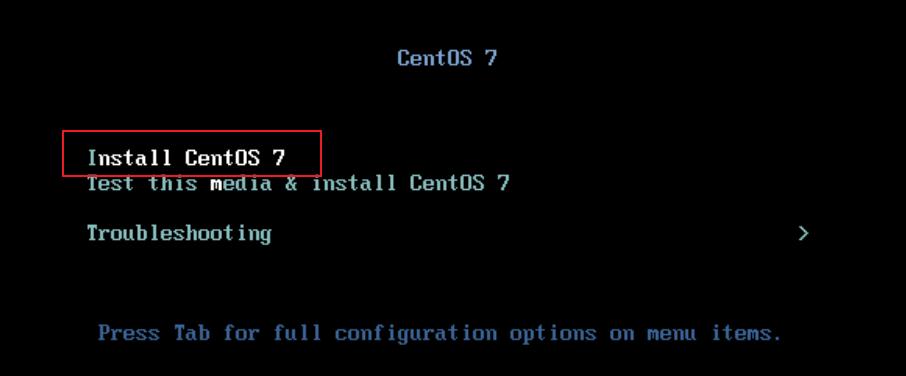
直接安装系统
等待一段时间后安装完成