
作者:Peter酱
转发链接:https://mp.weixin.qq.com/s/dLA6v4FoIqNDR8L_v_G6fg
正式开始
- 环境准备:Node、Watchman、Xcode 和 CocoaPods & XCode ,稳定的代理工具(如果没有稳定的代理工具,基本上可以考虑放弃了)
- 生成项目
npxreact-nativeinitApp
cdApp
yarncd
cdios
podinstall(注意不要+sudo,此处必须全局开启代理,否则*载下**会失败)
cd..
yarnios
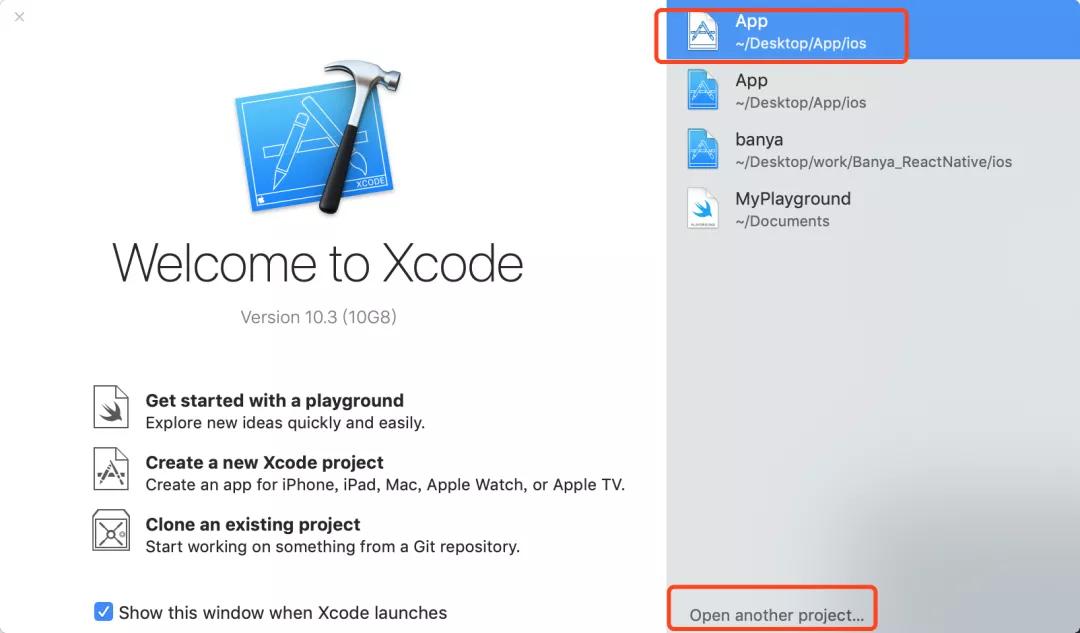
- 如果yarn ios后无法看到Simulator有APP,使用xCode找到这个项目的ios目录的.xcworkspace
❝
注意 0.60 版本之后的主项目文件是.xcworkspace,不是.xcodeproj。
❞
- 然后用xCode打开build,成功后模拟器就会出现APP,打开即可进入
- ⚠️:一定不要升级xCode高版本,跟我的版本保持一致最好,因为高版本xCode的voip唤醒激活会出现电话界面
如果你的环境是windows或者安卓,请参考官网
正式开始
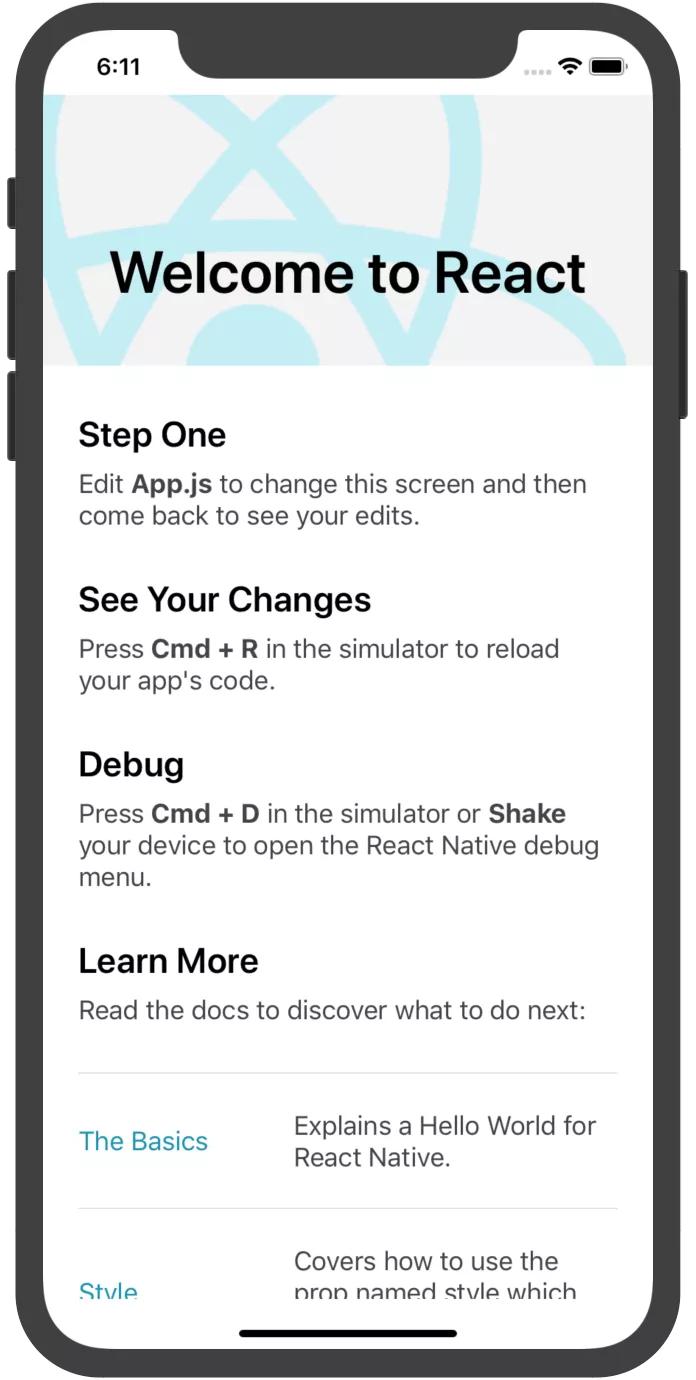
- 启动后,发现APP这样
- 我们打开主入口的index.js文件
/**
*@format
*/

import{AppRegistry}from'react-native';
importAppfrom'./App';
import{nameasappName}from'./app.json';

AppRegistry.registerComponent(appName,()=>App);
- 默认使用AppRegistry.registerComponent帮我们注册了一个组件(今天不对原理做过多讲解,有兴趣的可以自己搭建一个React-native脚手架,你会对整套运行原理、流程有一个真正的了解)
- 接下来看APP组件
importReactfrom'react';
import{
SafeAreaView,
StyleSheet,
ScrollView,
View,
Text,
StatusBar,
}from'react-native';

import{
Header,
LearnMoreLinks,
Colors,
DebugInstructions,
ReloadInstructions,
}from'react-native/Libraries/NewAppScreen';

constApp:()=>React$Node=()=>{
return(
<>
<StatusBarbarStyle="dark-content"/>
<SafeAreaView>
<ScrollView
contentInsetAdjustmentBehavior="automatic"
style={styles.scrollView}>
<Header/>
{global.HermesInternal==null?null:(
<Viewstyle={styles.engine}>
<Textstyle={styles.footer}>Engine:Hermes</Text>
</View>
)}
<Viewstyle={styles.body}>
<Viewstyle={styles.sectionContainer}>
<Textstyle={styles.sectionTitle}>StepOne</Text>
<Textstyle={styles.sectionDescription}>
Edit<Textstyle={styles.highlight}>App.js</Text>tochangethis
screenandthencomebacktoseeyouredits.
</Text>
</View>
<Viewstyle={styles.sectionContainer}>
<Textstyle={styles.sectionTitle}>SeeYourChanges</Text>
<Textstyle={styles.sectionDescription}>
<ReloadInstructions/>
</Text>
</View>
<Viewstyle={styles.sectionContainer}>
<Textstyle={styles.sectionTitle}>Debug</Text>
<Textstyle={styles.sectionDescription}>
<DebugInstructions/>
</Text>
</View>
<Viewstyle={styles.sectionContainer}>
<Textstyle={styles.sectionTitle}>LearnMore</Text>
<Textstyle={styles.sectionDescription}>
Readthedocstodiscoverwhattodonext:
</Text>
</View>
<LearnMoreLinks/>
</View>
</ScrollView>
</SafeAreaView>
</>
);
};

conststyles=StyleSheet.create({
...
});

exportdefaultApp;
我们今天只看react-native这个库,默认导出的内容.
- 即下面这段代码
import{
SafeAreaView,
StyleSheet,
ScrollView,
View,
Text,
StatusBar,
}from'react-native';
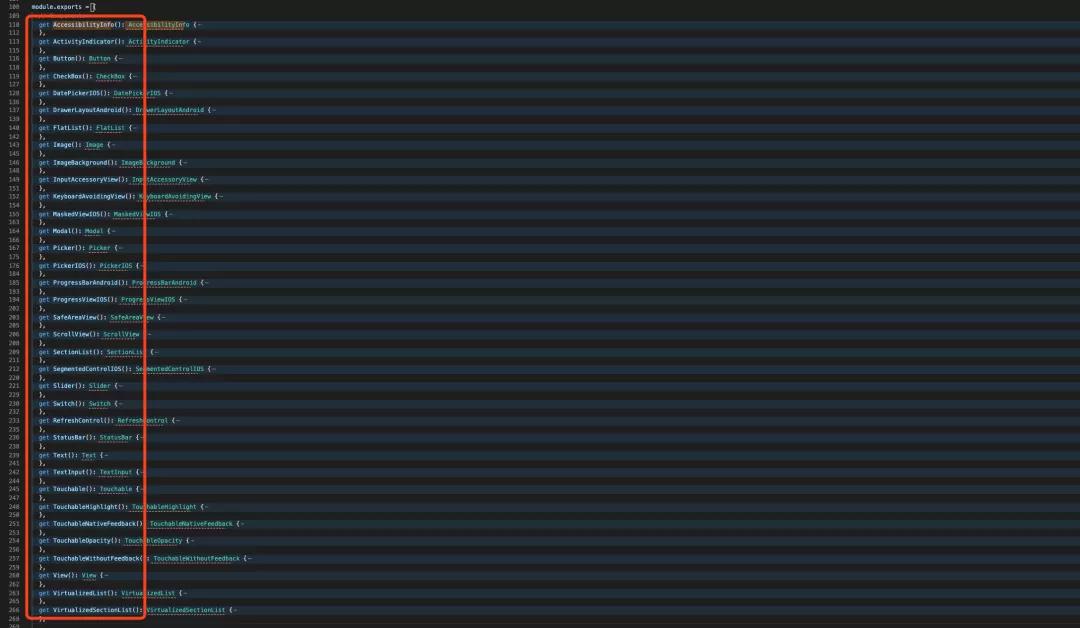
- 打开react-native源码
'usestrict';

importtypeofButtonfrom'./Libraries/Components/Button';
....

exporttypeHostComponent<T>=_HostComponentInternal<T>;

constinvariant=require('invariant');
constwarnOnce=require('./Libraries/Utilities/warnOnce');

module.exports={
//Components


getButton():Button{
returnrequire('./Libraries/Components/Button');
},
...
};

if(__DEV__){
//$FlowFixMeThisisintentional:FlowwillerrorwhenattemptingtoaccessART.
Object.defineProperty(module.exports,'ART',{
configurable:true,
get(){
invariant(
false,
'ARThasbeenremovedfromReactNative.'+
"Itcannowbeinstalledandimportedfrom'@react-native-community/art'insteadof'react-native'."+
'Seehttps://github.com/react-native-community/art',
);
},
});

//$FlowFixMeThisisintentional:FlowwillerrorwhenattemptingtoaccessListView.
Object.defineProperty(module.exports,'ListView',{
configurable:true,
get(){
invariant(
false,
'ListViewhasbeenremovedfromReactNative.'+
'Seehttps://fb.me/nolistviewformoreinformationoruse'+
'`deprecated-react-native-listview`.',
);
},
});

//$FlowFixMeThisisintentional:FlowwillerrorwhenattemptingtoaccessSwipeableListView.
Object.defineProperty(module.exports,'SwipeableListView',{
configurable:true,
get(){
invariant(
false,
'SwipeableListViewhasbeenremovedfromReactNative.'+
'Seehttps://fb.me/nolistviewformoreinformationoruse'+
'`deprecated-react-native-swipeable-listview`.',
);
},
});

//$FlowFixMeThisisintentional:FlowwillerrorwhenattemptingtoaccessWebView.
Object.defineProperty(module.exports,'WebView',{
configurable:true,
get(){
invariant(
false,
'WebViewhasbeenremovedfromReactNative.'+
"Itcannowbeinstalledandimportedfrom'react-native-webview'insteadof'react-native'."+
'Seehttps://github.com/react-native-community/react-native-webview',
);
},
});

//$FlowFixMeThisisintentional:FlowwillerrorwhenattemptingtoaccessNetInfo.
Object.defineProperty(module.exports,'NetInfo',{
configurable:true,
get(){
invariant(
false,
'NetInfohasbeenremovedfromReactNative.'+
"Itcannowbeinstalledandimportedfrom'@react-native-community/netinfo'insteadof'react-native'."+
'Seehttps://github.com/react-native-community/react-native-netinfo',
);
},
});

//$FlowFixMeThisisintentional:FlowwillerrorwhenattemptingtoaccessCameraRoll.
Object.defineProperty(module.exports,'CameraRoll',{
configurable:true,
get(){
invariant(
false,
'CameraRollhasbeenremovedfromReactNative.'+
"Itcannowbeinstalledandimportedfrom'@react-native-community/cameraroll'insteadof'react-native'."+
'Seehttps://github.com/react-native-community/react-native-cameraroll',
);
},
});

//$FlowFixMeThisisintentional:FlowwillerrorwhenattemptingtoaccessImageStore.
Object.defineProperty(module.exports,'ImageStore',{
configurable:true,
get(){
invariant(
false,
'ImageStorehasbeenremovedfromReactNative.'+
'Togetabase64-encodedstringfromalocalimageuseeitherofthefollowingthird-partylibraries:'+
"*expo-file-system:`readAsStringAsync(filepath,'base64')`"+
"*react-native-fs:`readFile(filepath,'base64')`",
);
},
});

//$FlowFixMeThisisintentional:FlowwillerrorwhenattemptingtoaccessImageEditor.
Object.defineProperty(module.exports,'ImageEditor',{
configurable:true,
get(){
invariant(
false,
'ImageEditorhasbeenremovedfromReactNative.'+
"Itcannowbeinstalledandimportedfrom'@react-native-community/image-editor'insteadof'react-native'."+
'Seehttps://github.com/react-native-community/react-native-image-editor',
);
},
});

//$FlowFixMeThisisintentional:FlowwillerrorwhenattemptingtoaccessTimePickerAndroid.
Object.defineProperty(module.exports,'TimePickerAndroid',{
configurable:true,
get(){
invariant(
false,
'TimePickerAndroidhasbeenremovedfromReactNative.'+
"Itcannowbeinstalledandimportedfrom'@react-native-community/datetimepicker'insteadof'react-native'."+
'Seehttps://github.com/react-native-community/datetimepicker',
);
},
});

//$FlowFixMeThisisintentional:FlowwillerrorwhenattemptingtoaccessViewPagerAndroid.
Object.defineProperty(module.exports,'ViewPagerAndroid',{
configurable:true,
get(){
invariant(
false,
'ViewPagerAndroidhasbeenremovedfromReactNative.'+
"Itcannowbeinstalledandimportedfrom'@react-native-community/viewpager'insteadof'react-native'."+
'Seehttps://github.com/react-native-community/react-native-viewpager',
);
},
});
}
- 我删了一些导入和get定义,方便阅读
- 这个源码文件大概有650行,module.export暴露出来了很多东西,但是,区分多种
- 一种是Components组件
- 一种是API
- 一种是Plugins
- 一种是Prop Types
- 还有一种是最后的DEV环境下,
逐个攻破
- 首先是组件
- 其次是API
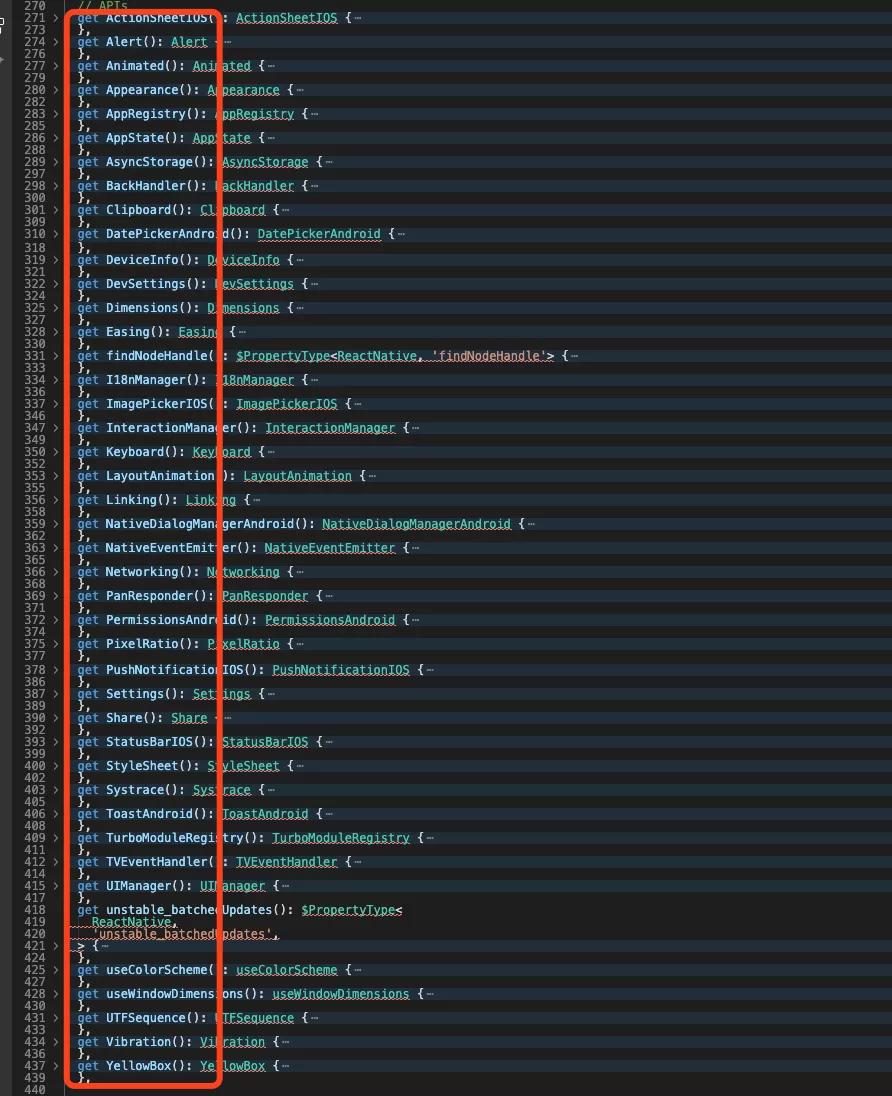
- 然后是Plugins
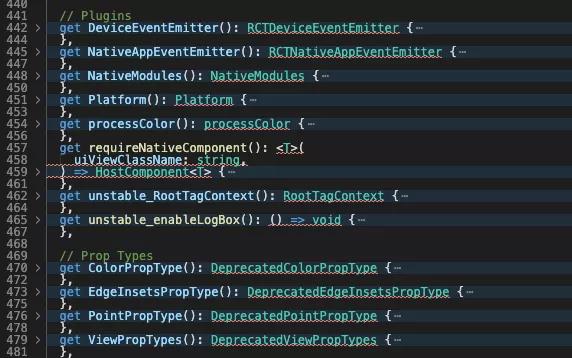
- 然后是Prop types

- 最后是DEV环境下的对旧版本的部分API使用方式警告
可以看到入口文件中的一些API
- 例如
getAppRegistry():AppRegistry{
returnrequire('./Libraries/ReactNative/AppRegistry');
},
- 图片
getImage():Image{
returnrequire('./Libraries/Image/Image');
},
拿Image组件源码示例
- 找到./Libraries/Image/Image源码
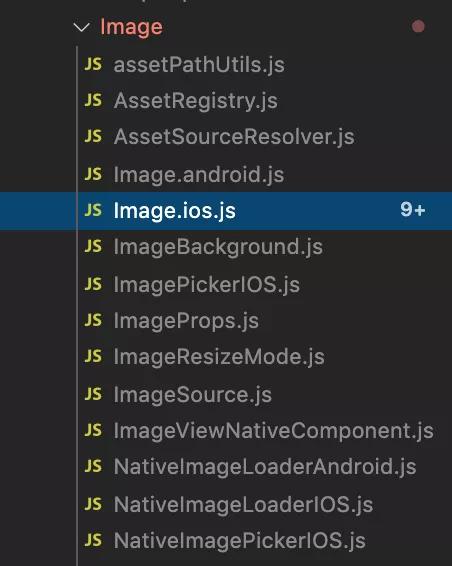
- 脚手架应该根据是react-native run ios 还是 安卓,选择加载对应js,我们找到Image.ios.js文件,只有200行,今天重点主攻下
- 默认暴露
module.exports=((Image:any):React.AbstractComponent<
ImagePropsType,
React.ElementRef<typeofRCTImageView>,
>&
ImageComponentStatics);
- Image对象

- Image组件真正展示的
return(
<RCTImageView
{...props}
ref={forwardedRef}
style={style}
resizeMode={resizeMode}
tintColor={tintColor}
source={sources}
/>
);
- 找到RCTImageView,ImageViewNativeComponent.js这个文件
letImageViewNativeComponent;

if(global.RN$Bridgeless){
ImageViewNativeComponent=codegenNativeComponent<NativeProps>(
'RCTImageView',
);
}else{
ImageViewNativeComponent=requireNativeComponent<NativeProps>(
'RCTImageView',
);
}

module.exports=(ImageViewNativeComponent:HostComponent<NativeProps>);
- 真正展示的是ImageViewNativeComponent,关于上面这段源码我查阅了一些的外文资料和其他源码,最终发现了一个注释
constNativeModules=require('../BatchedBridge/NativeModules');
constturboModuleProxy=global.__turboModuleProxy;

exportfunctionget<T:TurboModule>(name:string):?T{
if(!global.RN$Bridgeless){
//Backwardcompatibilitylayerduringmigration.
constlegacyModule=NativeModules[name];
if(legacyModule!=null){
return((legacyModule:any):T);
}
}
if(turboModuleProxy!=null){
constmodule:?T=turboModuleProxy(name);
returnmodule;
}
returnnull;
}

exportfunctiongetEnforcing<T:TurboModule>(name:string):T{
constmodule=get(name);
returnmodule;
}
- 即Backward compatibility layer during migration.,即迁移过程中向后兼容,即兼容性处理
- 这个codegenNativeComponent就是图片展示最终的一环,我们去看看是什么
忽略类型等其它空值警告判断,直入主题
letcomponentNameInUse=
options&&options.paperComponentName
?options.paperComponentName
:componentName;

if(options!=null&&options.paperComponentNameDeprecated!=null){
if(UIManager.getViewManagerConfig(componentName)){
componentNameInUse=componentName;
}elseif(
options.paperComponentNameDeprecated!=null&&
UIManager.getViewManagerConfig(options.paperComponentNameDeprecated)
){
componentNameInUse=options.paperComponentNameDeprecated;
}else{
thrownewError(
`Failedtofindnativecomponentforeither${componentName}or${options.paperComponentNameDeprecated||
'(unknown)'}`,
);
}
}

//Ifthisfunctionisrunatruntimethenthatmeanstheviewconfigswerenot
//generatedwiththeviewconfigbabelplugin,soweneedtorequirethenativecomponent.
//
//Thiswillbeusefulduringmigration,buteventuallythiswillerror.
return(requireNativeComponent<Props>(
componentNameInUse,
):HostComponent<Props>);
- 还是 要先看UIManager.getViewManagerConfig
'usestrict';

importtype{Spec}from'./NativeUIManager';

interfaceUIManagerJSInterfaceextendsSpec{
+getViewManagerConfig:(viewManagerName:string)=>Object;
+createView:(
reactTag:?number,
viewName:string,
rootTag:number,
props:Object,
)=>void;
+updateView:(reactTag:number,viewName:string,props:Object)=>void;
+manageChildren:(
containerTag:?number,
moveFromIndices:Array<number>,
moveToIndices:Array<number>,
addChildReactTags:Array<number>,
addAtIndices:Array<number>,
removeAtIndices:Array<number>,
)=>void;
}

constUIManager:UIManagerJSInterface=
global.RN$Bridgeless===true
?require('./DummyUIManager')//NoUIManagerinbridgelessmode
:require('./PaperUIManager');

module.exports=UIManager;
- 进入PaperUIManager找到getViewManagerConfig
getViewManagerConfig:function(viewManagerName:string):any{
if(
viewManagerConfigs[viewManagerName]===undefined&&
NativeUIManager.getConstantsForViewManager
){
try{
viewManagerConfigs[
viewManagerName
]=NativeUIManager.getConstantsForViewManager(viewManagerName);
}catch(e){
viewManagerConfigs[viewManagerName]=null;
}
}

constconfig=viewManagerConfigs[viewManagerName];
if(config){
returnconfig;
}

//Ifwe'reintheChromeDebugger,let'snoteventrycallingthesync
//method.
if(!global.nativeCallSyncHook){
returnconfig;
}

if(
NativeUIManager.lazilyLoadView&&
!triedLoadingConfig.has(viewManagerName)
){
constresult=NativeUIManager.lazilyLoadView(viewManagerName);
triedLoadingConfig.add(viewManagerName);
if(result.viewConfig){
getConstants()[viewManagerName]=result.viewConfig;
lazifyViewManagerConfig(viewManagerName);
}
}

returnviewManagerConfigs[viewManagerName];
},
- viewManagerConfigs初始化是一个空对象,key-value形式存储、管理这些原生视图配置
- 我突然发现我错了路线,因为React-native虽然是用js写代码,不过最终都是转换成原生控件,回到主题的第一个代码底部
return(requireNativeComponent<Props>(
componentNameInUse,
):HostComponent<Props>);
- 最最关键的是:requireNativeComponent,根据componentName去加载原生组件,找到源码
'usestrict';

constcreateReactNativeComponentClass=require('../Renderer/shims/createReactNativeComponentClass');
constgetNativeComponentAttributes=require('./getNativeComponentAttributes');
importtype{HostComponent}from'../Renderer/shims/ReactNativeTypes';

constrequireNativeComponent=<T>(uiViewClassName:string):HostComponent<T>=>
((createReactNativeComponentClass(uiViewClassName,()=>
getNativeComponentAttributes(uiViewClassName),
):any):HostComponent<T>);

module.exports=requireNativeComponent;
❝
最重要的加载原生组件的代码找到了
❞
((createReactNativeComponentClass(uiViewClassName,()=>
getNativeComponentAttributes(uiViewClassName),
):any):HostComponent<T>)
解析`createReactNativeComponentClass
- 给createReactNativeComponentClass传入uiViewClassName即组件name,传入回调函数,返回getNativeComponentAttributes(uiViewClassName)
- 找到源码createReactNativeComponentClass
/**
*Copyright(c)Facebook,Inc.anditsaffiliates.
*
*ThissourcecodeislicensedundertheMITlicensefoundinthe
*LICENSEfileintherootdirectoryofthissourcetree.
*
*@format
*@flowstrict-local
*/

'usestrict';

import{ReactNativeViewConfigRegistry}from'react-native/Libraries/ReactPrivate/ReactNativePrivateInterface';

importtype{ViewConfigGetter}from'./ReactNativeTypes';

const{register}=ReactNativeViewConfigRegistry;

/**
*CreatesarenderableReactNativehostcomponent.
*UsethismethodforviewconfigsthatareloadedfromUIManager.
*UsecreateReactNativeComponentClass()forviewconfigsdefinedwithinJavaScript.
*
*@param{string}configiOSViewconfiguration.
*@private
*/
constcreateReactNativeComponentClass=function(
name:string,
callback:ViewConfigGetter,
):string{
returnregister(name,callback);
};

module.exports=createReactNativeComponentClass;
- 跟我预想一样,向register函数传入name和cb,注册成功后触发callback(getNativeComponentAttributes)
- 找到ReactNativePrivateInterface.js里面的ReactNativeViewConfigRegistry
getReactNativeViewConfigRegistry():ReactNativeViewConfigRegistry{
returnrequire('../Renderer/shims/ReactNativeViewConfigRegistry');
},
- 再找到register方法
exports.register=function(name:string,callback:ViewConfigGetter):string{
invariant(
!viewConfigCallbacks.has(name),
'Triedtoregistertwoviewswiththesamename%s',
name,
);
invariant(
typeofcallback==='function',
'Viewconfiggettercallbackforcomponent`%s`mustbeafunction(received`%s`)',
name,
callback===null?'null':typeofcallback,
);
viewConfigCallbacks.set(name,callback);
returnname;
};
- 重点:viewConfigCallbacks.set(name, callback);viewConfigCallbacks是一个Map类型(ES6),key-value数据结构,怎么理解这段代码,看注释:
按名称注册本机视图/组件。
提供了一个回调函数来从UIManager加载视图配置。
回调被延迟直到视图被实际呈现。
- 至此,加载原生组件逻辑配合之前的UImanager,getViewManagerConfig那块源码就解析完了。
- 这是我们传入的cb(回调函数),获取原生组件属性
functiongetNativeComponentAttributes(uiViewClassName:string):any{
constviewConfig=UIManager.getViewManagerConfig(uiViewClassName);

invariant(
viewConfig!=null&&viewConfig.NativeProps!=null,
'requireNativeComponent:"%s"wasnotfoundintheUIManager.',
uiViewClassName,
);

//TODO:Thisseemslikeawholelotofruntimeinitializationforevery
//nativecomponentthatcanbeeitheravoidedorsimplified.
let{baseModuleName,bubblingEventTypes,directEventTypes}=viewConfig;
letnativeProps=viewConfig.NativeProps;
while(baseModuleName){
constbaseModule=UIManager.getViewManagerConfig(baseModuleName);
if(!baseModule){
warning(false,'Basemodule"%s"doesnotexist',baseModuleName);
baseModuleName=null;
}else{
bubblingEventTypes={
...baseModule.bubblingEventTypes,
...bubblingEventTypes,
};
directEventTypes={
...baseModule.directEventTypes,
...directEventTypes,
};
nativeProps={
...baseModule.NativeProps,
...nativeProps,
};
baseModuleName=baseModule.baseModuleName;
}
}

constvalidAttributes={};

for(constkeyinnativeProps){
consttypeName=nativeProps[key];
constdiff=getDifferForType(typeName);
constprocess=getProcessorForType(typeName);

validAttributes[key]=
diff==null&&process==null?true:{diff,process};
}

//Unfortunately,thecurrentsetupdeclaresstylepropertiesastop-level
//props.Thismakesitsoweallowstylepropertiesinthe`style`prop.
//TODO:Movestylepropertiesintoa`style`propanddisallowthemas
//top-levelpropsonthenativeside.
validAttributes.style=ReactNativeStyleAttributes;

Object.assign(viewConfig,{
uiViewClassName,
validAttributes,
bubblingEventTypes,
directEventTypes,
});

if(!hasAttachedDefaultEventTypes){
attachDefaultEventTypes(viewConfig);
hasAttachedDefaultEventTypes=true;
}

returnviewConfig;
}
- 至此,一个完整的React-native组件解析从加载、注册、展现整个过程就解析完了。
推荐React 学习相关文章
《常见的8个问题带你进阶 React》
《分析 React 组件的渲染性能「实践」》
《实践React Router v5:完整指南》
《前端必备的20种基本React工具「干货」》
《8个顶级React.js免费模板》
《推荐36种免费React模板和主题「干货」》
《「笔记」React Hooks 深入细品系列》
《这就是你日思夜想的 React 原生动态加载「值得收藏」》
《「干货满满」React Hooks 最佳实践》
《手把手教你如何实现一个React水印组件「实践」》
《「实践」React 中必会的 10 个概念》
《「干货」深入浅出React组件逻辑复用的那些事儿》
《手把手教你从Mixin深入到HOC再到Hook【React】》
《深入Facebook 官方React 状态管理器Recoil讲解》
《手把手教你实践搭建React组件库「超详细」》
《在 React 中自动复制文本到剪贴板「实践」》
《「干货满满」从零实现 react-redux》
《深入详解大佬用33行代码实现了React》
《让你的 React 组件性能跑得再快一点「实践」》
《React源码分析与实现(三):实践 DOM Diff》
《React源码分析与实现(一):组件的初始化与渲染「实践篇」》
《React源码分析与实现(二):状态、属性更新->setState「实践篇」》
《细说React 核心设计中的闪光点》
《手把手教你10个案例理解React hooks的渲染逻辑「实践」》
《React-Redux 100行代码简易版探究原理》
《手把手深入教你5个技巧编写更好的React代码【实践】》
《React 函数式组件性能优化知识点指南汇总》
《13个精选的React JS框架》
《深入浅出画图讲解React Diff原理【实践】》
《【React深入】React事件机制》
《Vue 3.0 Beta 和React 开发者分别杠上了》
《手把手深入Redux react-redux中间件设计及原理(上)【实践】》
《手把手深入Redux react-redux中间件设计及原理(下)【实践】》
《前端框架用vue还是react?清晰对比两者差异》
《为了学好 React Hooks, 我解析了 Vue Composition API》
《【React 高级进阶】探索 store 设计、从零实现 react-redux》
《写React Hooks前必读》
《深入浅出掌握React 与 React Native这两个框架》
《可靠React组件设计的7个准则之SRP》
《React Router v6 新特性及迁移指南》
《用React Hooks做一个搜索栏》
《你需要的 React + TypeScript 50 条规范和经验》
《手把手教你绕开React useEffect的陷阱》
《浅析 React / Vue 跨端渲染原理与实现》
《React 开发必须知道的 34 个技巧【近1W字】》
《三张图详细解说React组件的生命周期》
《手把手教你深入浅出实现Vue3 & React Hooks新UI Modal弹窗》
《手把手教你搭建一个React TS 项目模板》
《全平台(Vue/React/微信小程序)任意角度旋图片裁剪组件》
《40行代码把Vue3的响应式集成进React做状态管理》
《手把手教你深入浅出React 迷惑的问题点【完整版】》
作者:Peter酱
转发链接:https://mp.weixin.qq.com/s/dLA6v4FoIqNDR8L_v_G6fg