1 说明
=====
1.1 再发:是因为之前发过单人图和视频的骨架检测,多人报错。
《OpenPose:实现抖音很火的人体骨架和视频动态舞》
《人体骨架舞:OpenPose用python-opencv实现》
1.2 本次代码是完整的全套均可,本次代码讲解清楚,逐步分析,注释清楚,适合收藏。
即:
单人图片和单人视频检测,单人摄像头检测
多人图片和多人视频检测,多人摄像头检测
1.3 python的编程思维和编程要点复习,opencv相关知识。
2 图片
2.1 原图:来自*今条头日**免费正版图库

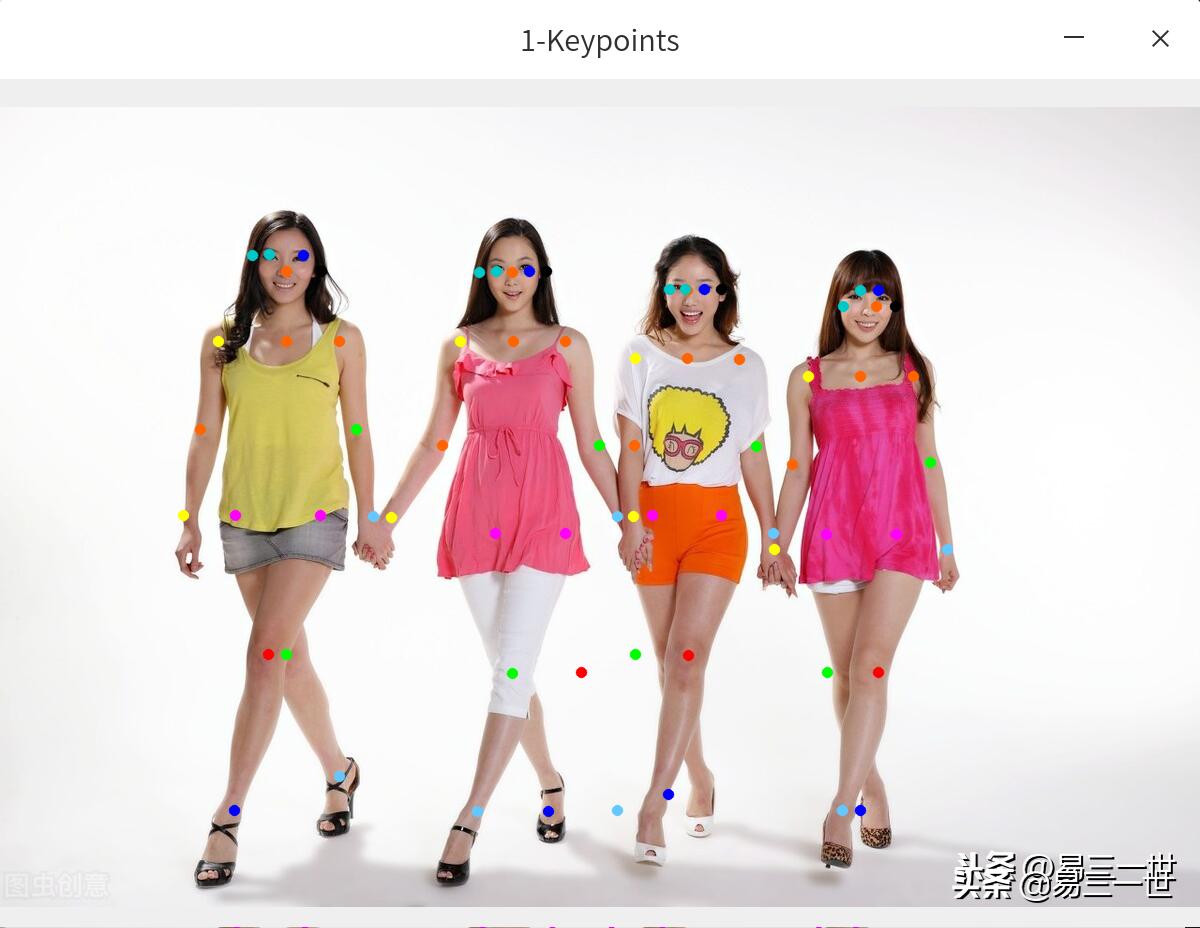
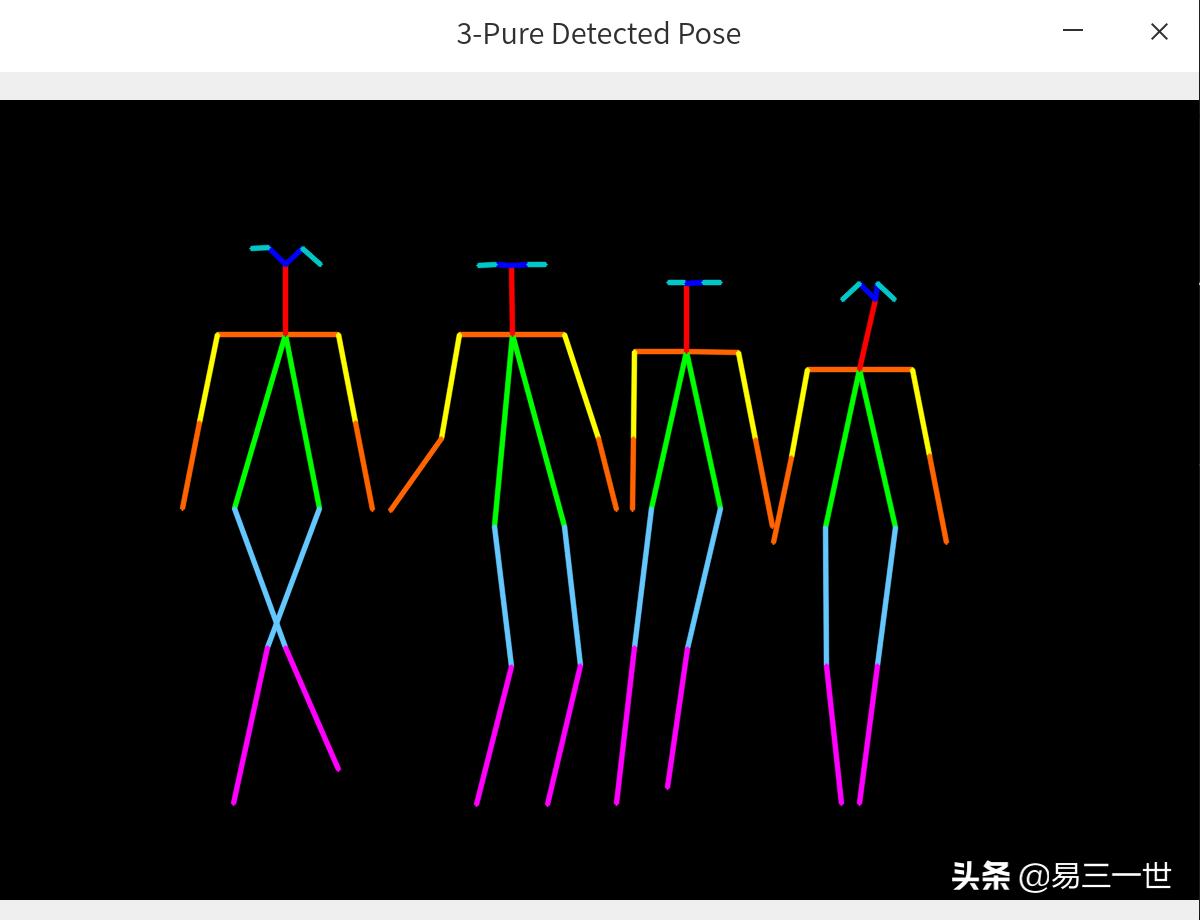
2.2 效果图

3 视频
=====
3.1 视频来源:something视频节选
you-get https://y.qq.com/n/yqq/mv/v/s0023dwf6xi.html
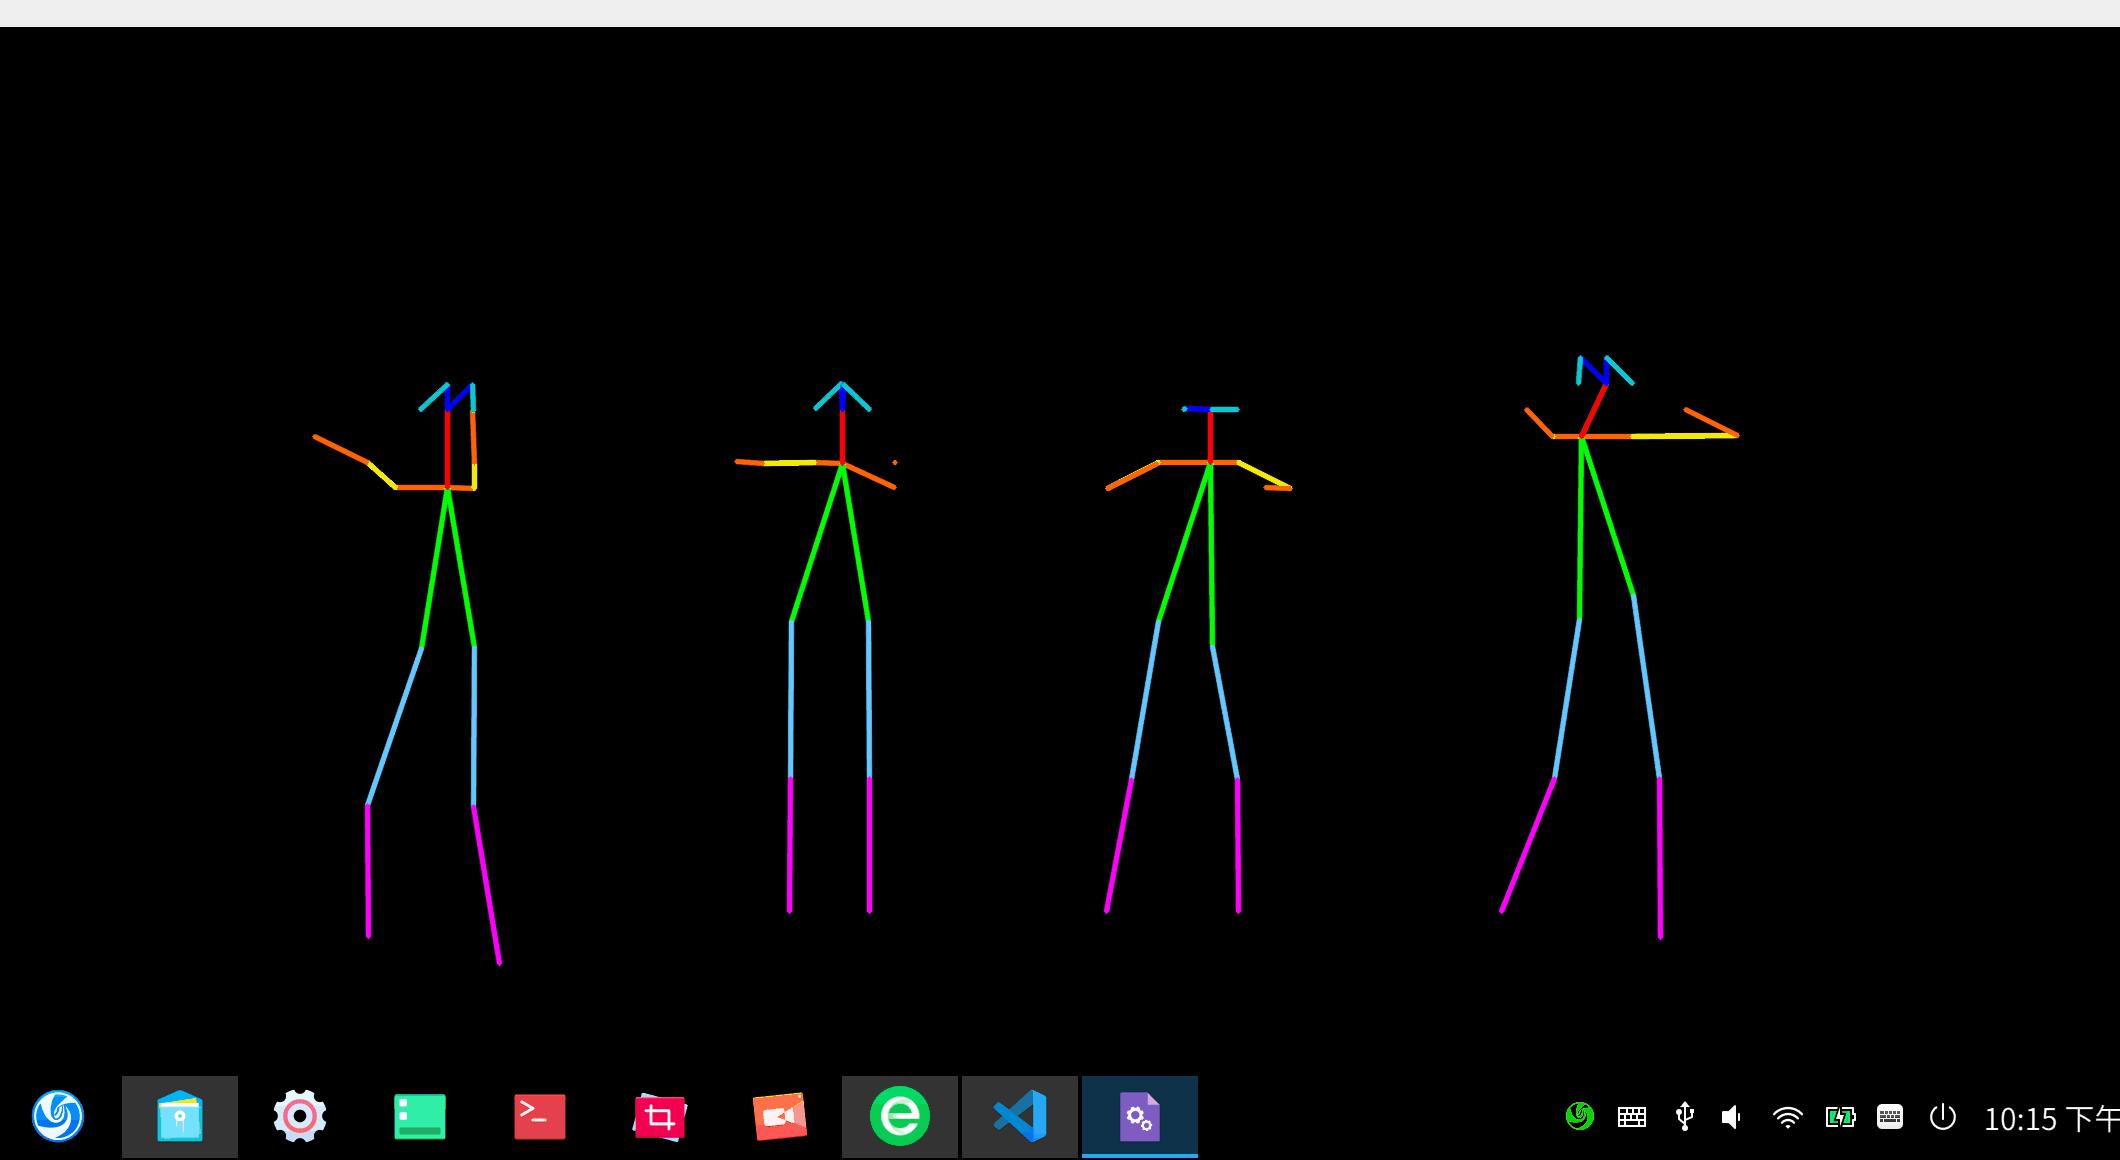
3.2 多人视频操作效果图
4 代码讲解
========
4.1
# 第1步:代码头部注释
# 代码名:person-openpose-all.py
# 本代码说明,是在源代码的基础上进行修改
# 原代码来自:https://github.com/spmallick/learnopencv
# 下的OpenPose-Multi-Person代码
# 可执行图片和视频的人体骨架测试
# 单人和多人骨架均可以
# 视频来自摄像头和mp4均可以
4.2
# 第2步:模块导入
import cv2
import numpy as np
import os  #路径管理
4.3 附注环境:python3.8+opencv4.4.0+linux系统+微软编辑器vscode,个人喜欢点击运行按钮。
# 第3步:路径管理
curpath = os.path.realpath(__file__)        # 获取当前代码的绝对路径
dirpath = os.path.dirname(curpath)          # 获取当前文件的文件夹路径
4.4 模型加载和参数设置
#第4步:模型加载
protoFile = dirpath+"/pose/coco/pose_deploy_linevec.prototxt"
#需要自己提前*载下**,第一篇文章已经告诉如何*载下**
weightsFile = dirpath+"/pose/coco/pose_iter_440000.caffemodel"

#参数设置
nPoints = 18
# COCO Output Format,名称列表,可注释掉
#keypointsMapping = ['Nose', 'Neck', 'R-Sho', 'R-Elb', 'R-Wr', 'L-Sho', 'L-Elb', 'L-Wr', 'R-Hip', 'R-Knee', 'R-Ank', 'L-Hip', 'L-Knee', 'L-Ank', 'R-Eye', 'L-Eye', 'R-Ear', 'L-Ear']

POSE_PAIRS = [[1,2], [1,5], [2,3], [3,4], [5,6], [6,7],
              [1,8], [8,9], [9,10], [1,11], [11,12], [12,13],
              [1,0], [0,14], [14,16], [0,15], [15,17],
              [2,17], [5,16] ]

mapIdx = [[31,32], [39,40], [33,34], [35,36], [41,42], [43,44],
          [19,20], [21,22], [23,24], [25,26], [27,28], [29,30],
          [47,48], [49,50], [53,54], [51,52], [55,56],
          [37,38], [45,46]]

#颜色列表
colors = [ [0,100,255], [0,100,255], [0,255,255], [0,100,255], [0,255,255], [0,100,255],
         [0,255,0], [255,200,100], [255,0,255], [0,255,0], [255,200,100], [255,0,255],
         [0,0,255], [255,0,0], [200,200,0], [255,0,0], [200,200,0], [0,0,0]]
4.5 这块是关键,搞透了就是大牛,一般不需要调整。
# 第5步:函数定义
# 获取关节点函数
def getKeypoints(probMap, threshold=0.1):

    mapSmooth = cv2.GaussianBlur(probMap,(3,3),0,0)
    mapMask = np.uint8(mapSmooth>threshold)

    keypoints = []
    #find the blobs
    contours, _ = cv2.findContours(mapMask, cv2.RETR_TREE, cv2.CHAIN_APPROX_SIMPLE)
    #for each blob find the maxima
    for cnt in contours:
        blobMask = np.zeros(mapMask.shape)
        blobMask = cv2.fillConvexPoly(blobMask, cnt, 1)
        maskedProbMap = mapSmooth * blobMask
        _, maxVal, _, maxLoc = cv2.minMaxLoc(maskedProbMap)
        keypoints.append(maxLoc + (probMap[maxLoc[1], maxLoc[0]],))

    return keypoints


# Find valid connections between the different joints of a all persons present
def getValidPairs(output):
    valid_pairs = []
    invalid_pairs = []
    n_interp_samples = 10
    paf_score_th = 0.1
    conf_th = 0.7
    # loop for every POSE_PAIR
    for k in range(len(mapIdx)):
        # A->B constitute a limb
        pafA = output[0, mapIdx[k][0], :, :]
        pafB = output[0, mapIdx[k][1], :, :]
        pafA = cv2.resize(pafA, (frameWidth, frameHeight))
        pafB = cv2.resize(pafB, (frameWidth, frameHeight))

        # Find the keypoints for the first and second limb
        candA = detected_keypoints[POSE_PAIRS[k][0]]
        candB = detected_keypoints[POSE_PAIRS[k][1]]
        nA = len(candA)
        nB = len(candB)

        if( nA != 0 and nB != 0):
            valid_pair = np.zeros((0,3))
            for i in range(nA):
                max_j=-1
                maxScore = -1
                found = 0
                for j in range(nB):
                    # Find d_ij
                    d_ij = np.subtract(candB[j][:2], candA[i][:2])
                    norm = np.linalg.norm(d_ij)
                    if norm:
                        d_ij = d_ij / norm
                    else:
                        continue
                    # Find p(u)
                    interp_coord = list(zip(np.linspace(candA[i][0], candB[j][0], num=n_interp_samples),
                                            np.linspace(candA[i][1], candB[j][1], num=n_interp_samples)))
                    # Find L(p(u))
                    paf_interp = []
                    for k in range(len(interp_coord)):
                        paf_interp.append([pafA[int(round(interp_coord[k][1])), int(round(interp_coord[k][0]))],
                                           pafB[int(round(interp_coord[k][1])), int(round(interp_coord[k][0]))] ])
                    # Find E
                    paf_scores = np.dot(paf_interp, d_ij)
                    avg_paf_score = sum(paf_scores)/len(paf_scores)

                    # Check if the connection is valid
                    # If the fraction of interpolated vectors aligned with PAF is higher then threshold -> Valid Pair
                    if ( len(np.where(paf_scores > paf_score_th)[0]) / n_interp_samples ) > conf_th :
                        if avg_paf_score > maxScore:
                            max_j = j
                            maxScore = avg_paf_score
                            found = 1
                # Append the connection to the list
                if found:
                    valid_pair = np.append(valid_pair, [[candA[i][3], candB[max_j][3], maxScore]], axis=0)

            # Append the detected connections to the global list
            valid_pairs.append(valid_pair)
        else: # If no keypoints are detected
            #print("No Connection : k = {}".format(k))
            invalid_pairs.append(k)
            valid_pairs.append([])

    return valid_pairs, invalid_pairs


#分配到人的关节点和关节线函数
# This function creates a list of keypoints belonging to each person
# For each detected valid pair, it assigns the joint(s) to a person
def getPersonwiseKeypoints(valid_pairs, invalid_pairs):
    # the last number in each row is the overall score
    personwiseKeypoints = -1 * np.ones((0, 19))

    for k in range(len(mapIdx)):
        if k not in invalid_pairs:
            partAs = valid_pairs[k][:,0]
            partBs = valid_pairs[k][:,1]
            indexA, indexB = np.array(POSE_PAIRS[k])

            for i in range(len(valid_pairs[k])):
                found = 0
                person_idx = -1
                for j in range(len(personwiseKeypoints)):
                    if personwiseKeypoints[j][indexA] == partAs[i]:
                        person_idx = j
                        found = 1
                        break

                if found:
                    personwiseKeypoints[person_idx][indexB] = partBs[i]
                    personwiseKeypoints[person_idx][-1] += keypoints_list[partBs[i].astype(int), 2] + valid_pairs[k][i][2]

                # if find no partA in the subset, create a new subset
                elif not found and k < 17:
                    row = -1 * np.ones(19)
                    row[indexA] = partAs[i]
                    row[indexB] = partBs[i]
                    # add the keypoint_scores for the two keypoints and the paf_score
                    row[-1] = sum(keypoints_list[valid_pairs[k][i,:2].astype(int), 2]) + valid_pairs[k][i][2]
                    personwiseKeypoints = np.vstack([personwiseKeypoints, row])
    return personwiseKeypoints
4.6
#第6步:导入类型
#图片类
#常规是image1或者image,为了与视频代码兼容
#这里采用frame代替原来的image1
#frame = cv2.imread(dirpath+'/11.jpeg')

#---视频类---
cap = cv2.VideoCapture(dirpath+'/s.mp4') #mp4视频,cpu生成有一点慢
#cap = cv2.VideoCapture(0)  #摄像头
hasFrame, frame = cap.read()
#生成本目录下的视频
vid_writer = cv2.VideoWriter(dirpath+'/outputs.avi',cv2.VideoWriter_fourcc('M','J','P','G'), 10, (frame.shape[1],frame.shape[0]))
#---视频类---
4.7
#第7步:启动cpu训练和调动模型
net = cv2.dnn.readNetFromCaffe(protoFile, weightsFile)
net.setPreferableBackend(cv2.dnn.DNN_TARGET_CPU)
print("Using CPU device")
4.8
#第8步:循环内设置
while cv2.waitKey(1) < 0:
    #增加一张输出的黑*图色**片,用于显示骨架和数字
    out = np.zeros(frame.shape,np.uint8)  #add

    #---视频类,图片不需要,可以注释掉---
    hasFrame, frame = cap.read()
    frameCopy = np.copy(frame)
    #退出设置
    if not hasFrame:
        cv2.waitKey()
        break
    #---视频类---

    frameWidth = frame.shape[1]
    frameHeight = frame.shape[0]

    # Fix the input Height and get the width according to the Aspect Ratio
    inHeight = 368
    inWidth = int((inHeight/frameHeight)*frameWidth)

    inpBlob = cv2.dnn.blobFromImage(frame, 1.0 / 255, (inWidth, inHeight),
                            (0, 0, 0), swapRB=False, crop=False)

    net.setInput(inpBlob)
    output = net.forward()

    detected_keypoints = []
    keypoints_list = np.zeros((0,3))
    keypoint_id = 0
    threshold = 0.1

    for part in range(nPoints):
        probMap = output[0,part,:,:]
        probMap = cv2.resize(probMap, (frame.shape[1], frame.shape[0]))
        keypoints = getKeypoints(probMap, threshold)

        keypoints_with_id = []
        for i in range(len(keypoints)):
            keypoints_with_id.append(keypoints[i] + (keypoint_id,))
            keypoints_list = np.vstack([keypoints_list, keypoints[i]])
            keypoint_id += 1

        detected_keypoints.append(keypoints_with_id)

    frameClone = frame.copy()

    for i in range(nPoints):
        for j in range(len(detected_keypoints[i])):
            cv2.circle(frameClone, detected_keypoints[i][j][0:2], 5, colors[i], -1, cv2.LINE_AA)
    #展示窗口1:关节点
    cv2.imshow("1-Keypoints",frameClone)

    valid_pairs, invalid_pairs = getValidPairs(output)
    personwiseKeypoints = getPersonwiseKeypoints(valid_pairs, invalid_pairs)

    for i in range(17):
        for n in range(len(personwiseKeypoints)):
            index = personwiseKeypoints[n][np.array(POSE_PAIRS[i])]
            if -1 in index:
                continue
            B = np.int32(keypoints_list[index.astype(int), 0])
            A = np.int32(keypoints_list[index.astype(int), 1])
            cv2.line(frameClone, (B[0], A[0]), (B[1], A[1]), colors[i], 3, cv2.LINE_AA)

            cv2.line(out, (B[0], A[0]), (B[1], A[1]), colors[i], 3, cv2.LINE_AA)  #add

    #展示窗口2:骨架==关节线
    cv2.imshow("2-Detected Pose" , frameClone)
    #展示窗口3:纯骨架==关节线
    cv2.imshow("3-Pure Detected Pose" , out)  #add

#---视频类,需要下面的代码,图片检测,可以注释掉---
    vid_writer.write(frameClone)

vid_writer.release()
#---视频类---
结束,如果实时,可能需要GPU或者高性能计算机。
基本完整!!