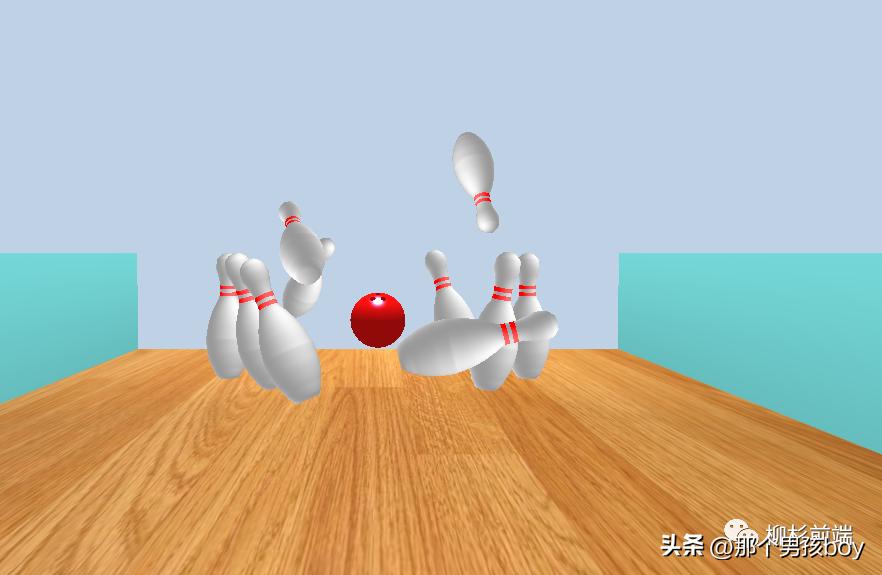
关于cannon.js我们已经学习了一些知识,今天就使用已学的cannon.js物理引擎的知识配合three基础知识来做一个保龄球小游戏,效果如下图,在线案例请点击链接(http://three.mrguo.link/cannon-baolingqiu)。
我们需要掌握的技能点,就是已经学过的cannon.js物理引擎知识、three.js车削几何体、threeBSP和简单的shaderMaterial。下面我们来详细的说一说如何制作这个游戏。
1. 设计游戏
因为我们已经使用过一些物理引擎,所以第一步我们很容易想到要用three做地面网格和墙面网格并为他们生成尺寸相当的刚体数据,这里面要求墙面和地面固定不动,所以刚体质量设为0。然后就是瓶子,瓶子我们可以直接*载下**模型,但是为了复习之前的知识,我选择使用车削几何体配合着色器来完成。瓶子的刚体我们暂时使用柱体来模拟(虽然和瓶子网格不匹配,但是在物理引擎中其实很少使用外形匹配的刚体,一是因为和实际的效果相差并不大,二是因为简单刚体的计算相对简单),车削几何体所需要的点我们可以通过画图或者ps来算出。
但是cannon.js的Cylinder默认的up方向和three.js的CylinderGeometry的up方向是不同的,这里要注意。然后就是关于保龄球的设计思路,玩过保龄球的都知道,保龄球上面是有三个洞的(方便手指拿球),我们考虑使用ThreeBSP来绘制网格,相应的刚体我们使用球体即可。关于相机的控制,我们不使用控制器,在投球之前我们使用左右键来控制相机的左右移动,投球后我们让相机跟随球运动,在球发生相撞时,我们固定相机的位置。球的出射方向我们仍然使用鼠标指针控制(使用屏幕坐标转三维坐标),最后使用GUi来重置游戏即可,差不多就是这个思路,下面我们来看代码。
2. 游戏代码
代码比较简洁,有必要的我们在代码中标注。
1. 初始化刚体
initCannon() {
        //初始化物理世界
    world = new CANNON.World();
    world.gravity.set(0, -9.8, 0);
    world.broadphase = new CANNON.NaiveBroadphase();
    world.solver.iterations = 10;
        //初始化地面刚体
    let groundBody = new CANNON.Body({
        mass: 0,
        shape: new CANNON.Box(new CANNON.Vec3(groundSize.x / 2, groundSize.y / 2, groundSize.z / 2)),
        position: new CANNON.Vec3(0, -groundSize.y / 2, 0),
        material: new CANNON.Material({friction: 1, restitution: 0})
    })
    world.addBody(groundBody);
        //初始化墙面刚体
    let wallLeftBody = new CANNON.Body({
        mass: 0,
        shape: new CANNON.Box(new CANNON.Vec3(wallSize.x / 2, wallSize.y / 2, wallSize.z / 2)),
        position: new CANNON.Vec3(-(wallSize.x + groundSize.x) / 2, wallSize.y / 2, 0),
        material: new CANNON.Material({friction: 0, restitution: 0})
    })
    world.addBody(wallLeftBody);
    let wallRightBody = new CANNON.Body({
        mass: 0,
        shape: new CANNON.Box(new CANNON.Vec3(wallSize.x / 2, wallSize.y / 2, wallSize.z / 2)),
        position: new CANNON.Vec3((wallSize.x + groundSize.x) / 2, wallSize.y / 2, 0),
        material: new CANNON.Material({friction: 0, restitution: 0})
    })
    world.addBody(wallRightBody);
        //初始化保龄球刚体
    sphereBody = new CANNON.Body({
        mass: 50,
        shape: new CANNON.Sphere(sphereRadius),
        position: new CANNON.Vec3(0, sphereRadius, 400),
        material: new CANNON.Material({friction: 0.2, restitution: 0})
    })
    world.addBody(sphereBody);
        //初始化瓶子刚体
    for(let i=0; i<pingPositionArray.length; i++) {
        let pingBody = new CANNON.Body({
            mass: 1,
            shape: new CANNON.Cylinder(2.5,2.5,20,18),
            quaternion: new CANNON.Quaternion().setFromEuler(Math.PI / 2, 0, 0),//因为柱体的up方向和three的up方向相差90度,这里我们先旋转90度让圆柱体“站起来”。
            position: new CANNON.Vec3(pingPositionArray[i][0],pingPositionArray[i][1],pingPositionArray[i][2]),
            material: new CANNON.Material({friction: 0.01, restitution: 1})
        })
        pingBodies.push(pingBody);//将瓶子刚体添加到刚体数组中,这样更容易计算
        world.addBody(pingBody);
    }
},
2. 初始化three.js
initThree() {
        //创建地面
    this.initGround();
        //创建墙体
    this.initWall();
        //创建瓶子 并引用
    let pingMesh = this.createPing();
        //pingPositionArray是瓶子位置数组
    for(let i=0; i<pingPositionArray.length; i++) {
        let pingMeshCopy = pingMesh.clone();
        pingMeshCopy.position.set(pingPositionArray[i][0],pingPositionArray[i][1],pingPositionArray[i][2]);
        pingMeshes.push(pingMeshCopy);
        scene.add(pingMeshCopy);
    }
        //创建保龄球并引用
    sphereMesh = this.createSphere();
    sphereMesh.position.set(0, sphereRadius, 400);
    sphereMesh.rotation.set(Math.PI / 6, 0, - Math.PI / 12);
    scene.add(sphereMesh);
},
createPing() {
    let points = [];
        //latheArray是瓶子车削几何体所需点的数组
    for(let i=0; i<latheArray.length; i++) {
        points.push(new THREE.Vector2(latheArray[i][0]/10, latheArray[i][1]/10))
    }
    let geometry = new THREE.LatheGeometry(points, 30);
    geometry.computeVertexNormals();
        //着色器材质
    let material = new THREE.ShaderMaterial({
        vertexShader: `
            varying vec3 vPosition;
            varying vec3 vNormal;
            void main() {
                vNormal = normal;
                vPosition = position;
                gl_Position = projectionMatrix * modelViewMatrix * vec4( position, 1.0 );
            }
        `,
        fragmentShader: `
            varying vec3 vPosition;
            varying vec3 vNormal;
            void main() {
                                //光线向量
                vec3 light = vec3(10.0, 10.0, 10.0);
                float strength = dot(light, vNormal) / length(light);
                float y = vPosition.y;
                                //在 [3.1, 3.7]和[4.2, 4.8]之间被渲染成红色并根据光线向量和法向量模拟光照
                if(y < 4.8 && y > 4.2 || y < 3.7 && y > 3.1) {
                    gl_FragColor=vec4(1.0, 0.4 * pow(strength, 2.0), 0.4 * pow(strength, 2.0), 1.0);
                } else {
                    gl_FragColor=vec4( 0.6 + 0.4 * pow(strength, 2.0), 0.6 + 0.4 * pow(strength, 2.0), 0.6 + 0.4 * pow(strength, 2.0), 1.0);
                }
            }
        `,
        side: THREE.DoubleSide
    });
    let mesh = new THREE.Mesh(geometry, material);
    mesh.quaternion.copy(new THREE.Quaternion().setFromEuler(new THREE.Euler(-Math.PI / 2, 0, 0)));
        //这里将柱体网格添加到group中,为的是group的旋转
    let group = new THREE.Group();
    group.add(mesh);
    return group;
},
createSphere() {
    let material = new THREE.MeshPhongMaterial({color: 0xEE100F, shininess: 60, specular: 0x2C85E1, side: THREE.DoubleSide});
    let sphereGeometry = new THREE.SphereGeometry(sphereRadius, 40, 24);
    let cylinderGeometry = new THREE.CylinderGeometry(sphereRadius/10,sphereRadius/10,sphereRadius,30);
    let sphereMesh = new THREE.Mesh(sphereGeometry, material);
    let cMesh1 = new THREE.Mesh(cylinderGeometry, material);
    let cMesh2 = cMesh1.clone();
    let cMesh3 = cMesh1.clone();
    cMesh1.position.set(1.14, sphereRadius, 0.67);
    cMesh2.position.set(-1.14, sphereRadius, 0.67);
    cMesh3.position.set(0, sphereRadius, -1.33);
        //构造BSP
    let bsp1 = new ThreeBSP(sphereMesh);
    let bsp2 = new ThreeBSP(cMesh1);
    let bsp3 = new ThreeBSP(cMesh2);
    let bsp4 = new ThreeBSP(cMesh3);
        //用球形几何体,减去三个小的圆柱体
    let resultBsp = bsp1.subtract(bsp2).subtract(bsp3).subtract(bsp4);
    let resultGeom = resultBsp.toGeometry();//这里我们只需要导出几何体
    resultGeom.mergeVertices();//注意这两步,不然保龄球不会计算法向量,也就不会平滑着色
    resultGeom.computeVertexNormals();
    return new THREE.Mesh(resultGeom, material);
},
initGround() {
    let texture = new THREE.TextureLoader().load('/static/images/base/ground.jpg');
    texture.wrapS = texture.wrapT = THREE.RepeatWrapping;
    texture.repeat.set(1, 4);
    let geometry = new THREE.BoxBufferGeometry(groundSize.x, groundSize.y, groundSize.z);
    let material = new THREE.MeshPhongMaterial({map: texture});
    let mesh = new THREE.Mesh(geometry, material);
    mesh.position.y = -groundSize.y / 2;
    scene.add(mesh);
},
initWall() {
    let material = new THREE.MeshLambertMaterial({color: 0x77dddd});
    let geometry = new THREE.BoxBufferGeometry(wallSize.x, wallSize.y, wallSize.z);
    let leftMesh = new THREE.Mesh(geometry, material);
    let rightMesh = leftMesh.clone();
    leftMesh.position.set(-(wallSize.x + groundSize.x) / 2, wallSize.y / 2, 0);
    rightMesh.position.set((wallSize.x + groundSize.x) / 2, wallSize.y / 2, 0);
    scene.add(leftMesh);
    scene.add(rightMesh);
},
3. 定义事件
这里我们需要鼠标mousemove事件和onkeydown,onkeyup事件
document.onkeydown = this.handler;
document.onkeyup = this.handler;
this.$refs.box.addEventListener('mousemove', event => {
        //鼠标移动,屏幕二维向量转三维向量
    let x = (event.clientX / window.innerWidth) * 2 - 1;
    let y = - (event.clientY / window.innerHeight) * 2 + 1;
    direction = new THREE.Vector3(x,y,-1).applyQuaternion(camera.getWorldQuaternion(new THREE.Quaternion())).normalize();
})
handler(event) {
    var down = (event.type == 'keydown');
    switch(event.keyCode){
        case 32: {
            if(down && time > event.timeStamp) {
                time = event.timeStamp;//time默认值为Infinity,第一次按下空格,给time赋值
            } else if(down) {
                relaxation = event.timeStamp - time;//持续按下,计算累积时间
            } else {
                                //根据持续时间给球初始化速度
                let t = relaxation > 5000 ? 500 : relaxation / 10;
                sphereBody.velocity.set(direction.x * t, direction.y * t, direction.z * t);
                sphereBody.angularVelocity.set(-1,0,0);
                time = Infinity;
            }
        }
            break;
        case 37:
            camera.position.x --;
            sphereBody.position.x --;
            break;
        case 39:
            camera.position.x ++;
            sphereBody.position.x ++;
            break;
    }
},
主要代码大致就是这样,下一节还会继续cannon.js的学习。
转载自:郭先生的博客(https://www.mrguo.link/article?id=55)