移动端开发必备
- 使用rem单位进行手机适配,在路径/src/assets/js/common.js里面加入以下代码,作为公用JS方法,便于每个页面调用。
// 页面单位rem
rem: function () {
    var docEl = document.documentElement,
    resizeEvt = 'orientationchange' in window ? 'orientationchange' : 'resize',
    recalc = function () {
        var clientWidth = docEl.clientWidth;
        if (!clientWidth) return;
        if (clientWidth >= 750) {
            docEl.style.fontSize = '100px';
        } else {
            docEl.style.fontSize = 100 * (clientWidth / 750) + 'px';
        }
    };
    recalc();
    window.addEventListener(resizeEvt, recalc, false);
}
这是rem布局的核心代码,如果页面宽度超过了750px,那么页面中html的font-size字体大小应为100px。否则,页面中html的font-size字体大小为: 100 * (当前页面宽度 / 750)。一般UI设计师提供的设计稿宽度是640px或750px,为了方便计算,选择750px,那么转化rem的时候,像素/100等于rem。比如:图片宽度100px,100px/100=1rem。
禁用a,button,input,select,textarea等标签背景变暗,直接在/src/assets/css/common.css加入如下代码即可:
// 去掉点击链接和文本框对象的半透明覆盖(iOS)或者虚框(Android)
a, button, input, optgroup, select, textarea {
    -webkit-tap-highlight-color: rgba(0, 0, 0, 0);
}
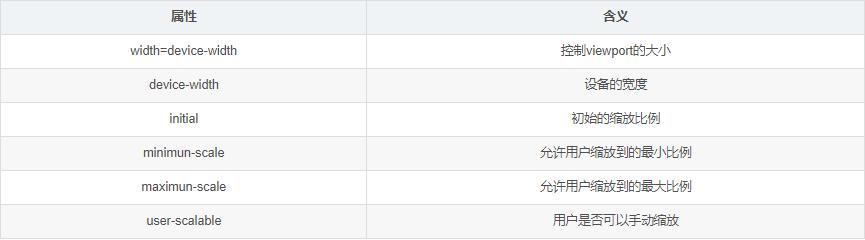
// 页面窗口自动调整到设备宽度,并禁止用户缩放页面
<meta name="viewport" content="width=device-width,initial-scale=1.0,minimum-scale=1.0,maximum-scale=1.0,user-scalable=0">
属性基本含义:
更多的meta:
//编码格式
<meta charset="UTF-8">
// 优先使用 IE 最新版本和 Chrome
<meta http-equiv="X-UA-Compatible" content="IE=edge,chrome=1"/>
// 兼容国产浏览器的高速模式
<meta name="renderer" content="webkit">
// UC强制全屏
<meta name=”full-screen” content=”yes”>
// 忽略将页面中的数字识别为电话号码
<meta name="format-detection" content="telephone=no">
// 忽略 android 平台对邮箱的识别
<meta name="format-detection" content="email=no">
// 添加到主屏幕后,会全屏显示
<meta name="apple-touch-fullscreen" content="yes" />
// 当网站添加到主屏幕快速启动方式,可隐藏地址栏,进针对ios的safari
<meta name="apple-mobile-web-app-capable" content="yes">
// 将网站添加到主屏幕快速启动方式,仅针对ios的safari顶端状态条的样式
// 可选default、black、black-translucent
<meta name="apple-mobile-web-app-status-bar-style" content="black-translucent">
// 页面描述
<meta name="description" content="不超过150个字符"/>
// 页面关键词,多个关键词用逗号分隔
<meta name="keywords" content=""/>
// 需要在网站的根目录下存放favicon图标,防止404请求
<link rel="shortcut icon" href="/favicon.ico">
input::-webkit-input-placeholder{
   color: red;
}
input, textarea {
  -webkit-appearance: none;
}
a, img {
  -webkit-touch-callout: none;
}
calc基本语法,支持加,减,乘,除; 在做手机端的时候非常有用的一个知识点。优点如下:
(1) 支持使用 “+”、"-"、"*"、"/" 四则运算
(2) 可以混合使用百分比(%)、px、em、rem等作为单位可进行计算
浏览器兼容性:IE9+、FF4.0+、chrome19+、safari6+
用法如下:
.box {
   	width: calc(100% - 20px - 2em);
}
<div class="box">测试文本</div>
flex弹性布局,容器的6个属性,一般与rem配合使用绝佳。
(1) flex-direction
(2) flex-wrap
(3) flex-flow
(4) justify-content
(5) align-items
(6) align-content
以上6个属性,具体如何使用,推荐阮一峰老师的flex布局教程,熟读+实操。
页面组件开发
整个网站的主体包括首页、商品列表页、商品搜索页、商品详情页、领取优惠券等页面组成。
根据UI设计师提供的设计稿制作静态界面,我们在动手前先来分析一下首页有哪些场景设计或交互效果。上一篇已经介绍首页长什么样,可以说出头部导航,搜索框,分享弹框按钮,轮播图,商品类目,商品列表页,返回顶部按钮,预加载动画。其他页面大家也可以开动脑筋想一想它们的场景设计或交互效果,思考多了收获也多。
再想一想,是不是可以进行前端组件化和模块化的思维开发呢?答案:肯定是。
也许有的小伙伴一知半解,有的却很陌生,有的经常听到面试官提这些概念问题。其实不难理解,简单说前端架构设计的目的是制定标准,提高质量和效率。那合理的架构就囊括工程化、组件化、模块化、规范化。
然而前端组件化、模块化能帮我们解决哪些问题呢?
组件化更多关注UI部分,页面的每个部件,比如头部导航,搜索框,商品列表甚至返回顶部按钮都可以成为一个组件,每个组件有独立的HTML、css、js代码。可以根据需要把它放在页面的任意部位,也可以和其他组件一起形成新的组件。一个页面是各个组件的结合,可以根据需要进行组装。
而模块化侧重功能的封装,主要是针对Javascript代码,隔离、组织复制的javascript代码,将它封装成一个个具有特定功能的模块。(比如常用到ES6模块)
前面讲的这些,还是没弄明白的话,可以去网上查找相关资料。
步入正轨
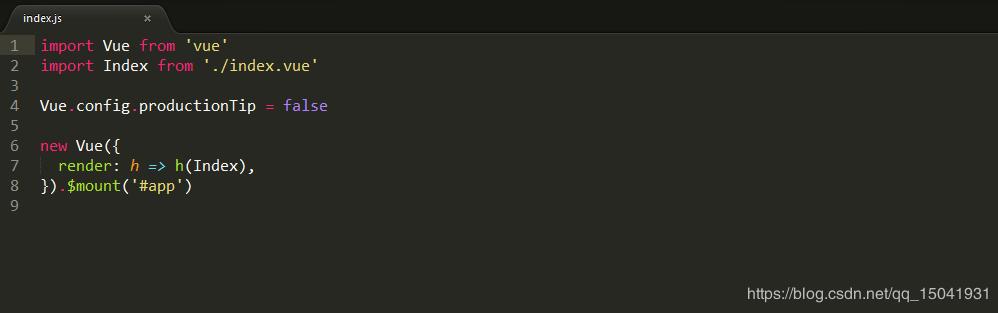
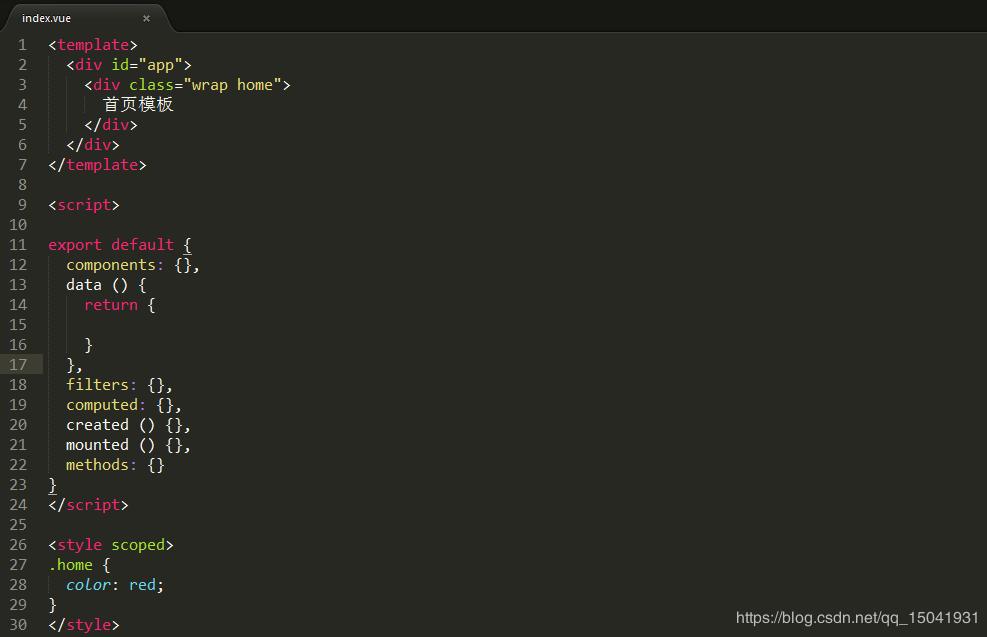
由于时间关系,会挑几个功能重点细讲,先看看首页模板组成:index.html,index.js,index.vue三个文件如下图:

首页效果图

了解了每个页面组成部分,接下来可以进行页面布局,开发静态界面,最后写业务逻辑与后端联调接口。之前有提到前端组件化思维,根据实际项目需求使用,经过分析,一般头部或底部导航、商品分类、商品列表、返回顶部按钮、loading预加载动画等等都可以抽离出来做成组件,在src/components/位置存放所有组件。比如头部导航是公用父组件,里面包括搜索框,可抽离出来做成公用子组件。由于作者很懒,没有实现抽离,直接写在模板页面。小伙伴可以自己抽时间尝试改成组件形式。
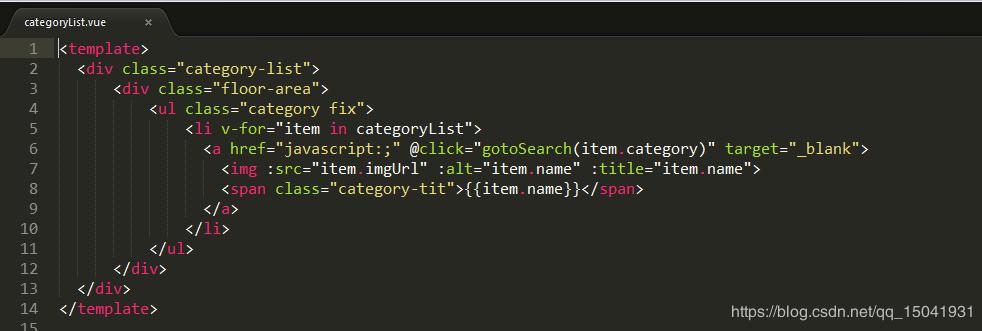
既然要做前端组件化开发,那就拿商品分类为例。在src/components/下创建categoryList.vue文件,在template模板标签写布局,代码如下图:
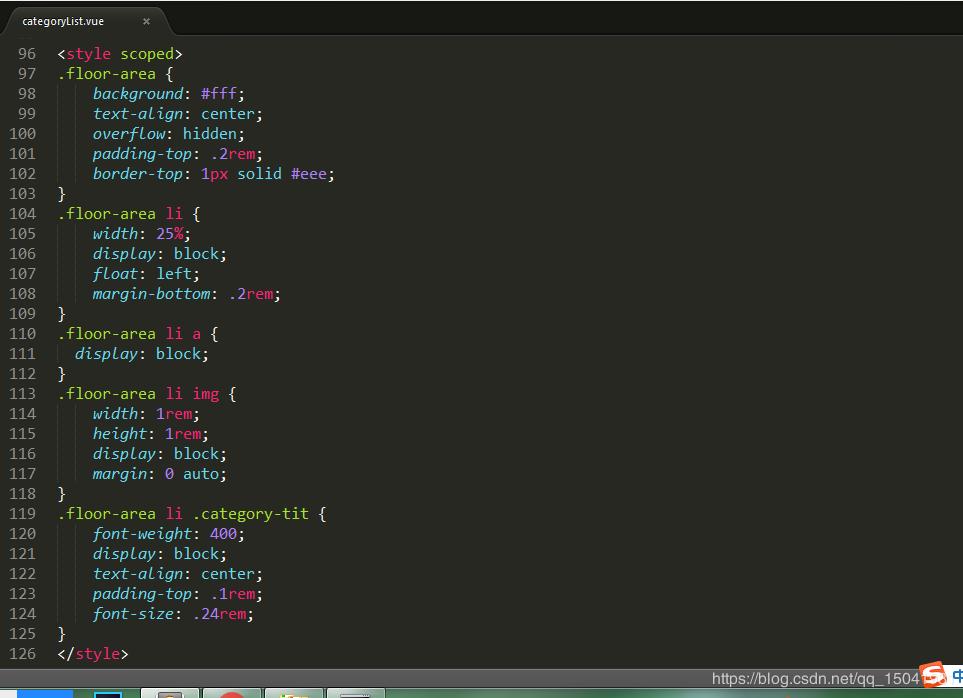
样式写在style标签里面,如果要使样式私有化,只在当下模块有效,可以在style标签上加scoped属性。代码如下图:
Vue实例获取商品分类数据,是在script标签中export default模块实现数据初始化,因为是对象数组,所以在data()函数里面自定义对象数组来初始化数据。代码如下:
<script>
export default {
  data () {
    return {
      categoryList: [
        {
            id: "1",
            category: 2,
            name: "男装",
            sort: "100",
            imgUrl: require('../assets/img/category/nanzhuang.png')
        },
        {
            id: "2",
            category: 1,
            name: "女装",
            sort: "100",
            imgUrl: require('../assets/img/category/nvzhuang.png')
        },
        {
            id: "3",
            category: 6,
            name: "居家",
            sort: "100",
            imgUrl: require('../assets/img/category/jujia.png')
        },
        {
            id: "4",
            category: 4,
            name: "母婴",
            sort: "100",
            imgUrl: require('../assets/img/category/muying.png')
        },
        {
            id: "5",
            category: 3,
            name: "内衣",
            sort: "100",
            imgUrl: require('../assets/img/category/meizhuang.png')
        },
        {
            id: "6",
            category: 7,
            name: "鞋包",
            sort: "100",
            imgUrl: require('../assets/img/category/xiebao.png')
        },
        {
            id: "7",
            category: 5,
            name: "美妆",
            sort: "100",
            imgUrl: require('../assets/img/category/meizhuang.png')
        },
        {
            id: "8",
            category: 0,
            name: "更多",
            sort: "100",
            imgUrl: require('../assets/img/category/more.png')
        }
      ]
    }
  }
 }在template模板里面获取初始化对象数组数据,采用v-for循环遍历对象数组,代码如下:
在template模板里面获取初始化对象数组数据,采用v-for循环遍历对象数组,代码如下:
<ul class="category fix">
  <li v-for="item in categoryList">
    <a href="javascript:;" @click="gotoSearch(item.category)" target="_blank">
      <img :src="item.imgUrl" :alt="item.name" :title="item.name">
      <span class="category-tit">{{item.name}}</span>
    </a>
  </li>
</ul>
顺便提一下Vue常用的点击事件,可以用v-on指令监听 DOM 事件,并在触发时运行一些 JavaScript 代码。
v-on:click = handleClick  // handleClick方法名,可带参数
// OR
@click = handleClick  // 点击事件简写
点击事件中调用的自定义方法名,统一写在methods属性里面,代码如下:
methods: {
  handleClick () {
    console.log('点击我') ;
  }
}
商品分类组件完整代码如下:
<template>
  <div class="category-list">
      <div class="floor-area">
          <ul class="category fix">
              <li v-for="item in categoryList">
                <a href="javascript:;" @click="gotoSearch(item.category)" target="_blank">
                  <img :src="item.imgUrl" :alt="item.name" :title="item.name">
                  <span class="category-tit">{{item.name}}</span>
                </a>
              </li>
          </ul>
      </div>
  </div>
</template>
<script>
export default {
  data () {
    return {
      categoryList: [
        {
            id: "1",
            category: 2,
            name: "男装",
            sort: "100",
            imgUrl: require('../assets/img/category/nanzhuang.png')
        },
        {
            id: "2",
            category: 1,
            name: "女装",
            sort: "100",
            imgUrl: require('../assets/img/category/nvzhuang.png')
        },
        {
            id: "3",
            category: 6,
            name: "居家",
            sort: "100",
            imgUrl: require('../assets/img/category/jujia.png')
        },
        {
            id: "4",
            category: 4,
            name: "母婴",
            sort: "100",
            imgUrl: require('../assets/img/category/muying.png')
        },
        {
            id: "5",
            category: 3,
            name: "内衣",
            sort: "100",
            imgUrl: require('../assets/img/category/meizhuang.png')
        },
        {
            id: "6",
            category: 7,
            name: "鞋包",
            sort: "100",
            imgUrl: require('../assets/img/category/xiebao.png')
        },
        {
            id: "7",
            category: 5,
            name: "美妆",
            sort: "100",
            imgUrl: require('../assets/img/category/meizhuang.png')
        },
        {
            id: "8",
            category: 0,
            name: "更多",
            sort: "100",
            imgUrl: require('../assets/img/category/more.png')
        }
      ]
    }
  },
  methods: {
    gotoSearch (category) {
      window.location.href = `../search?category=${category}` ;
    }
  },
  created () {},
  mounted () {}
}
</script>

<style scoped>
.floor-area {
    background: #fff;
    text-align: center;
    overflow: hidden;
    padding-top: .2rem;
    border-top: 1px solid #eee;
}
.floor-area li {
    width: 25%;
    display: block;
    float: left;
    margin-bottom: .2rem;
}
.floor-area li a {
  display: block;
}
.floor-area li img {
    width: 1rem;
    height: 1rem;
    display: block;
    margin: 0 auto;
}
.floor-area li .category-tit {
    font-weight: 400;
    display: block;
    text-align: center;
    padding-top: .1rem;
    font-size: .24rem;
}
</style>
商品分类组件开发完成后,如何引入自定义组件,代码如下:
<template>
  <div id="app">
  	// 模板中使用组件
  	// 第一种写法
  	<category-list></category-list>

  	// 第二种写法
  	<category-list>
		// slot自定义插槽内容,具体用法,参考Vue官网:https://cn.vuejs.org/v2/guide/components-slots.html
	</category-list>

  	// 第三种写法
  	<categoryList />
  </div>
</template>

<script>
// 引入组件
import categoryList from '@/components/categoryList'

export default {
	components: { categoryList }, // 注册组件
	data() {
		return {
			// 设置初始化数据
		}
	},
	methods: {},
	created() {},
	mounted() {}
}
</script>
现在讲讲首页轮播图效果有自动*放播**、左右滑动、点击图片跳内页或外链等等功能。如果自己想手写Vue轮播图特效没问题,多花一点点时间就可以完成,但如果赶项目,可以找一些市面上很成熟的开源免费插件,直接引入到你的项目中。我直接选用cdn方式引入swiper插件,操作如下:
// 先在首页index.html文件中引入以下外链
<link rel="stylesheet" href="https://unpkg.com/swiper/css/swiper.css">
<link rel="stylesheet" href="https://unpkg.com/swiper/css/swiper.min.css">
<script src="https://unpkg.com/swiper/js/swiper.js"> </script>
<script src="https://unpkg.com/swiper/js/swiper.min.js"> </script>
在template模板中使用

先在script标签下的methods属性中自定义初始化Swiper实例的方法initSwiper,然后再mounted生命周期函数中调用initSwiper方法,使轮播图生效,如下图:

Swiper插件的具体用法,可以参考官网API和DEMO示例:https://swiperjs.com/
动态获取数据调用API接口
上面提过开发商品分类组件数据获取方式是静态的,如果商品列表要动态获取数据,该怎么操作。由于项目采用前后端分离技术,通过后端提供的API接口调用获取动态数据。要求前后端同步进行开发,但是在后端完成前,暂时是没有数据返回给前端使用的,如果先写静态后面再改,就有重复工作的内耗存在。所以我们需要一种简单快速的模拟数据的模块或管理工具,这样我们自己提供或修改接口。下面提供两种方式,博主推荐第二种操作更简便。
一、mock文件
- 安装mockjs和axios
npm install -D mockjs
npm install -S axios

import Mock from 'mockjs'
let shopData = {
'success|1': [true, false],
'msg': function() {
if (this.success) {
return '调用成功';
} else {
return '调用失败';
}
},
'pageNum': 1,
'pageSize': 10,
'data': function() {
if (this.success) {
return this.result;
} else {
return this.result = [];
}
},
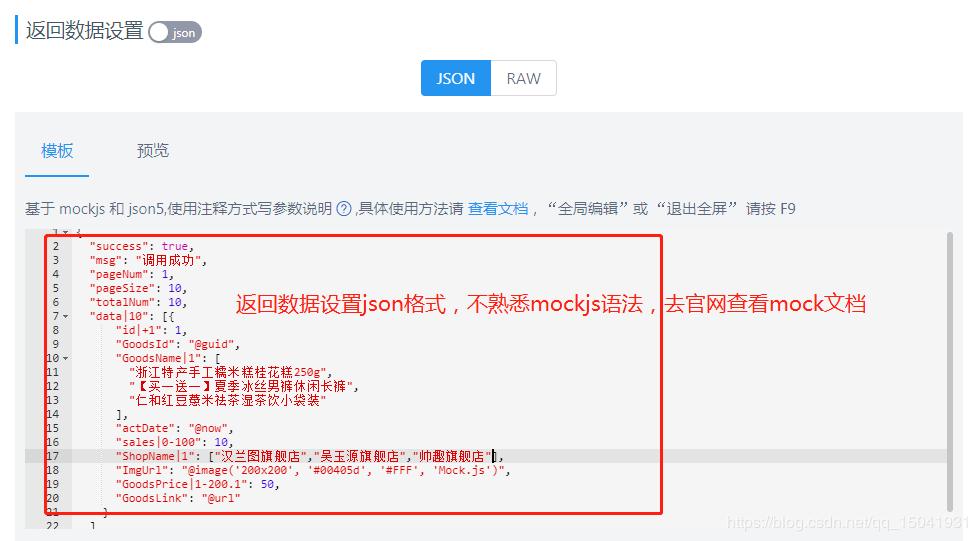
'result|1-10': [{
'id|+1': 1,
'GoodsId': '@guid',
'GoodsName|1': ['浙江特产手工糯米糕桂花糕250g', '【买一送一】夏季冰丝男裤休闲长裤', '仁和红豆薏米祛茶湿茶饮小袋装'],
'actDate': '@now',
'sales|0-100': 10,
'ShopName|1': ['汉兰图旗舰店', '吴玉源旗舰店', '帅趣旗舰店'],
'ImgUrl': '@image("200x200", "#00405d", "#FFF", "Mock.js")',
'GoodsPrice|1-200.1': 50,
'GoodsLink': '@url'
}],
'totalNum': function() {
return this.data.length;
},
}
//格式:Mock.mock(url, post/get, 返回的数据)
Mock.mock('/api/shoplist', shopData)
export default Mock
// mockjs 模拟商品列表接口
export function getMockData() {
  return network({
    url: '/shoplist',
    method: 'get'
  });
}

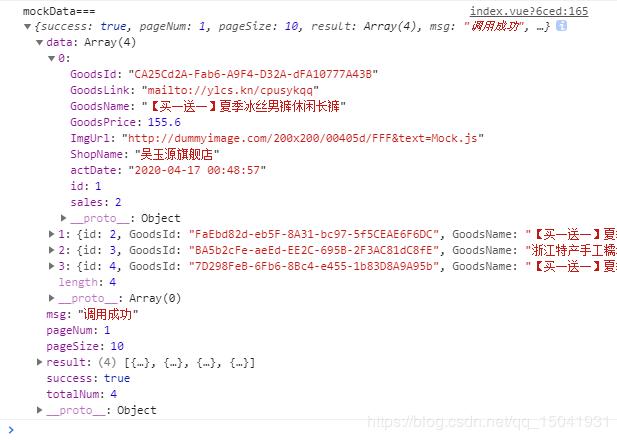
- 验证mock接口,直接在首页index.vue文件中使用
// 在script标签下引入定义好的mock接口方法
import { getMockData } from '@/assets/js/api'
methods: {
	// 封装mock接口方法调用
	getMockList() {
      getMockData().then(res => {
        console.log('mockData===', res)
      }).catch(err => {
        console.log(err)
      })
    }
}
mounted () {
    this.getMockList(); // 初始化调用mock数据
}
- 返回结果如下图:
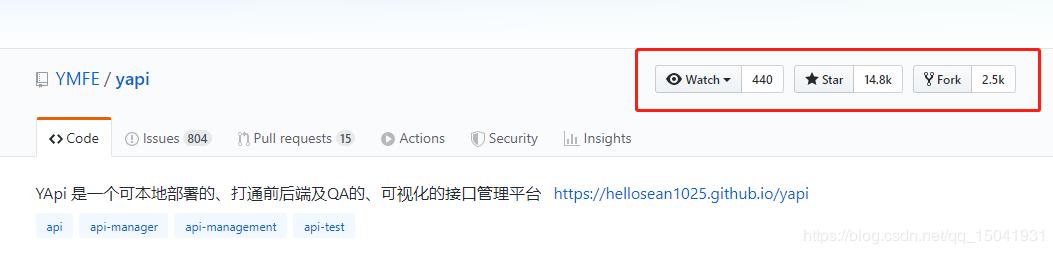
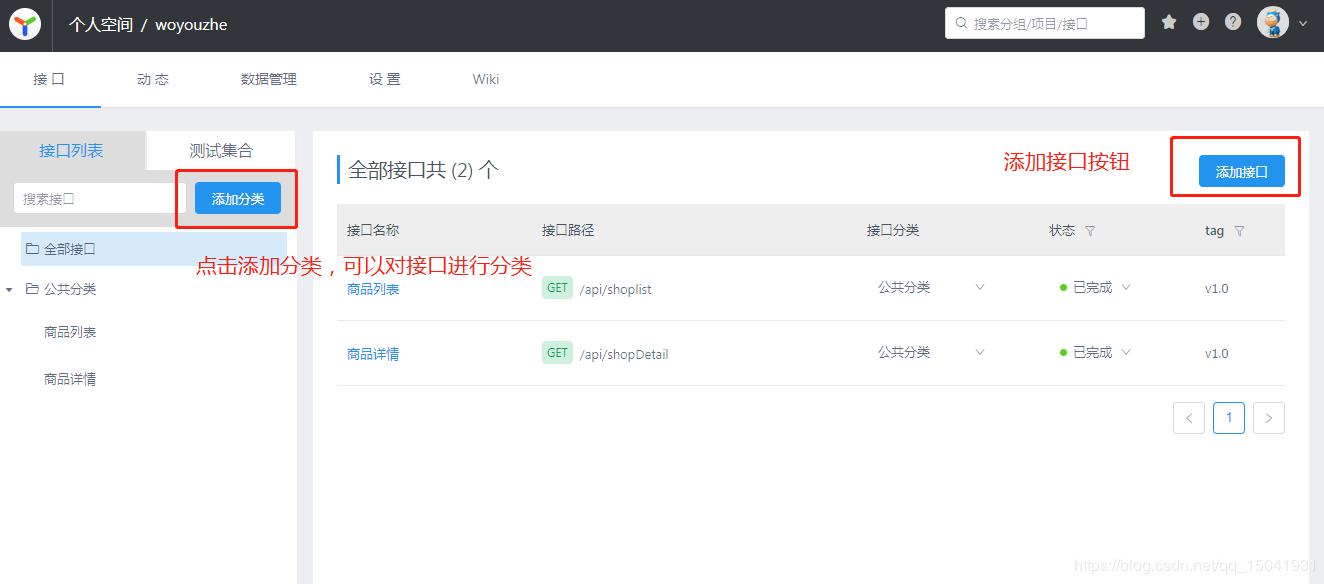
二、yapi管理工具
- 官网地址:http://yapi.demo.qunar.com/

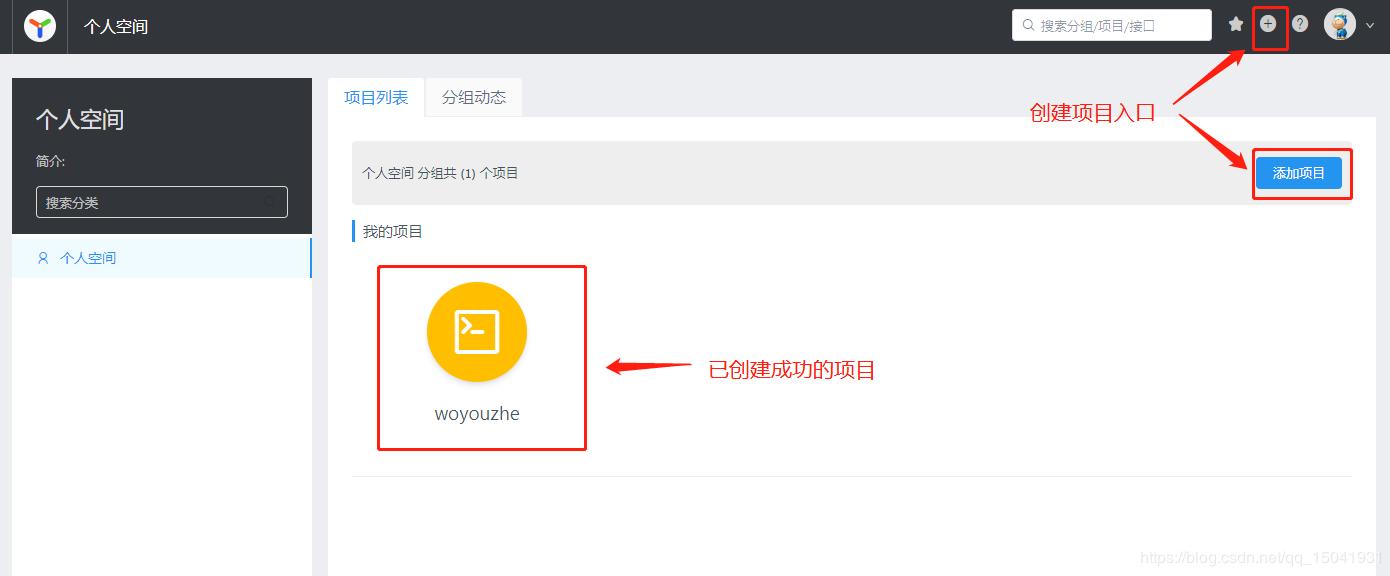
第一次进来是没有我的项目,需要自己去创建项目,上面截图有说明。接下来点击添加项目,进入新建项目页面。如下图:

一般填个项目名称,其他默认,提交就可以了。
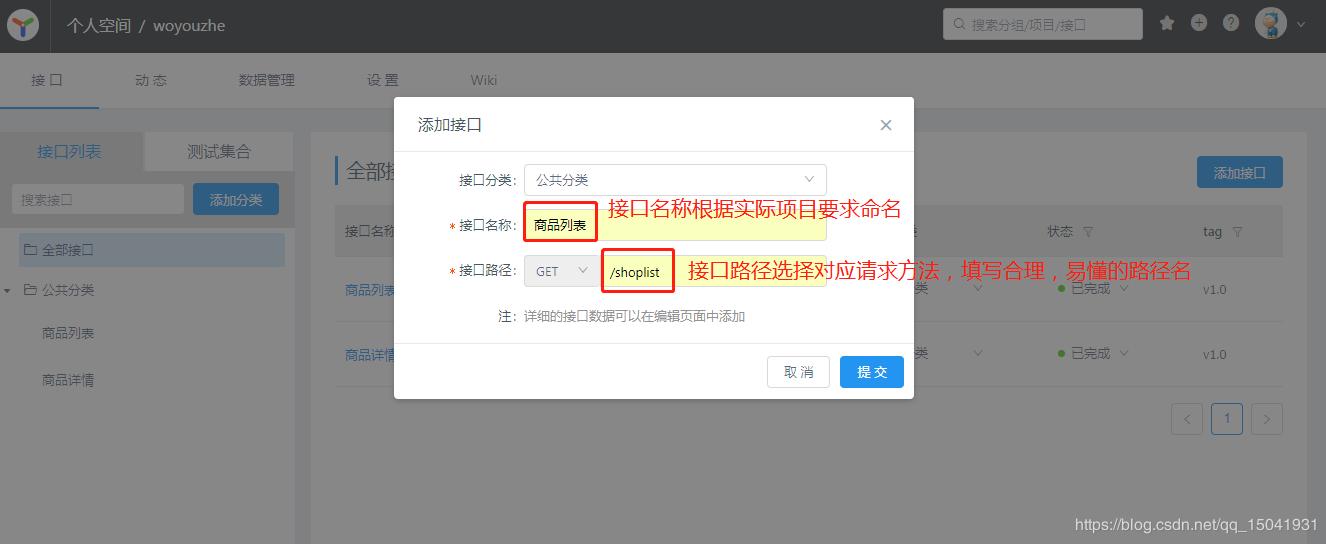
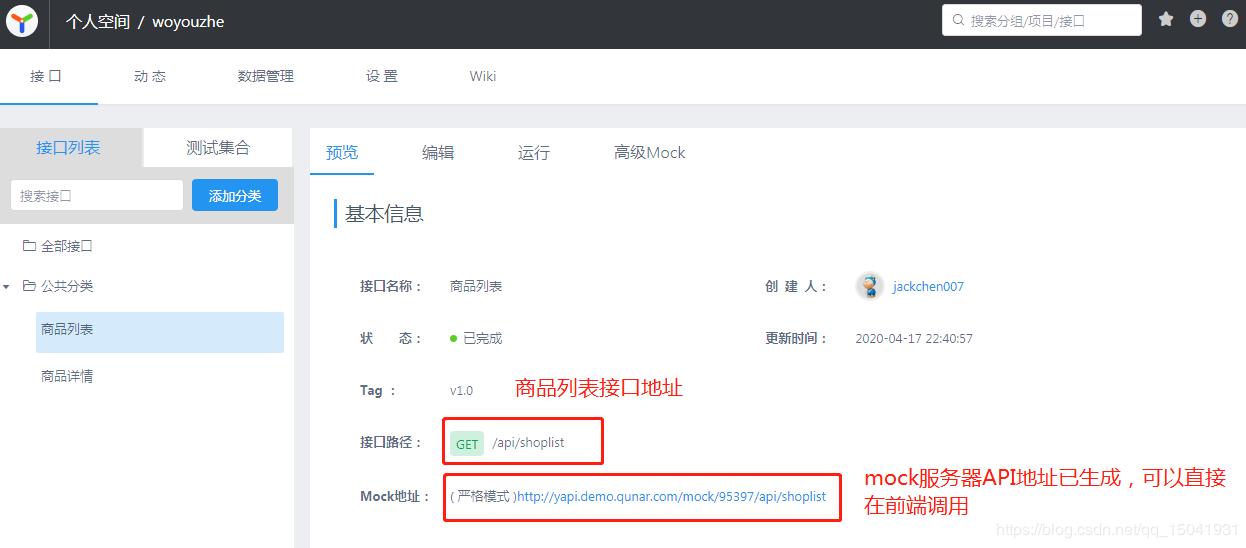
- 添加接口
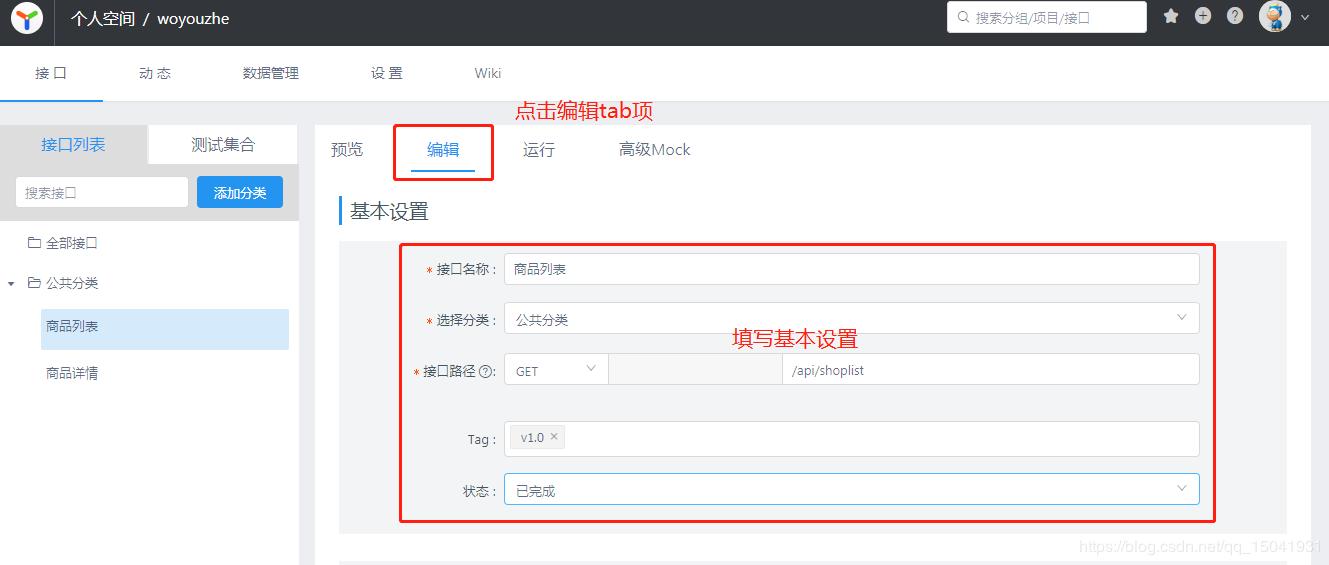
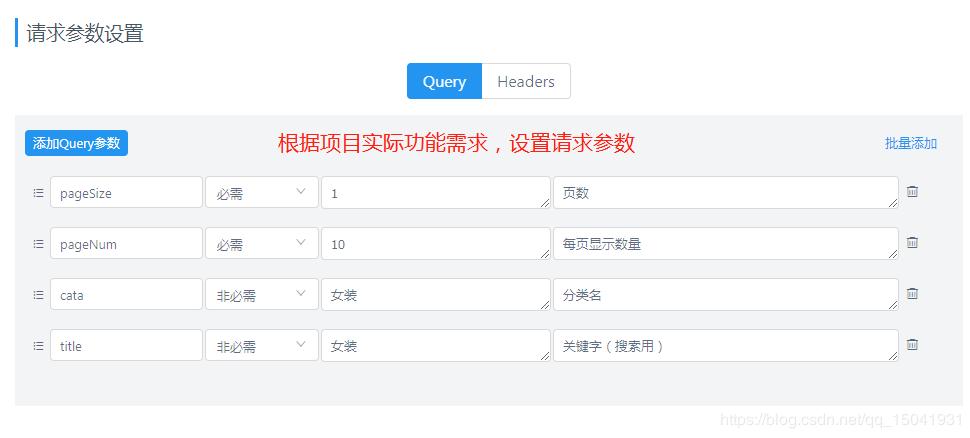

以上配置完成后,点击保存按钮,提示保存成功后,再回到预览界面。如下图:
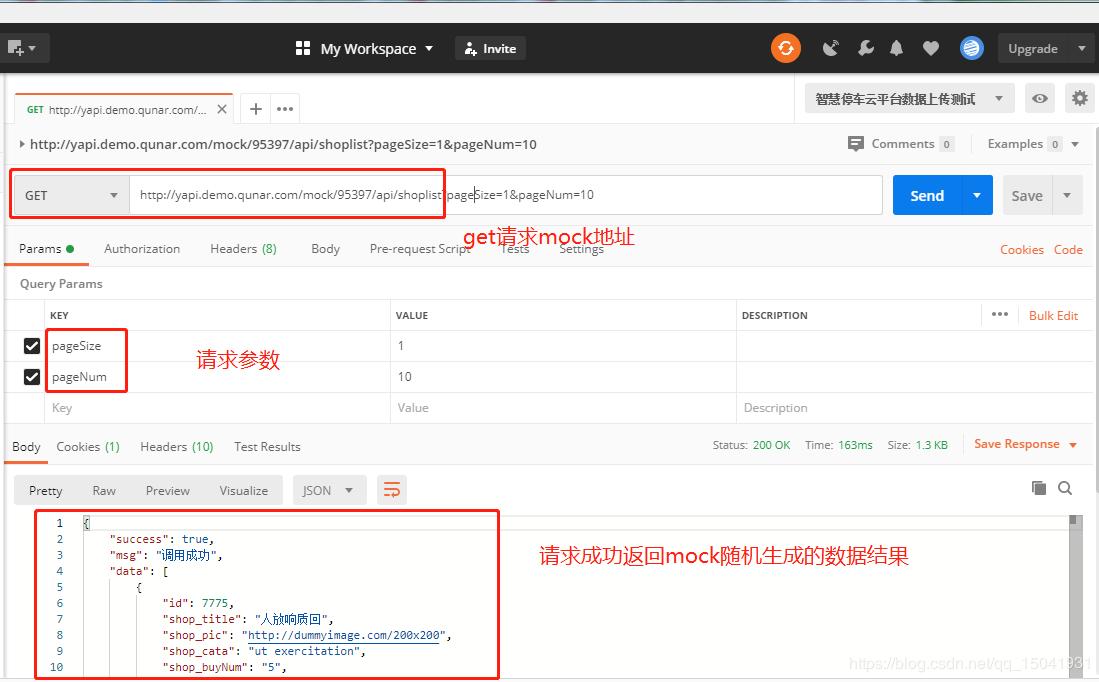
直接打开postman,测试API接口,如调用成功,说明模拟数据接口配置有效,如下图:
如需了解更多yapi的功能,请查看官网文档:https://hellosean1025.github.io/yapi
父子组件相互传值
先来说两个概念:
父组件通过props属性给子组件传值
父组件监听子组件this.$emit('事件名', 参数)方法获取值
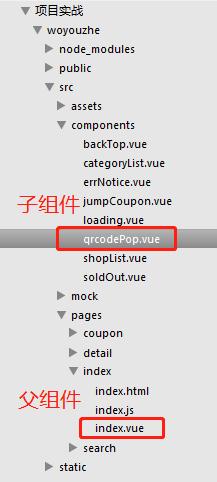
现在拿项目实例讲解上面两个功能,比如首页index.vue是父组件,二维码公众号弹框是子组件,如下图:
父组件传值给子组件,先在父组件data中定义isPopup初始值,然后在子组件上绑定isPopup,代码如下:
<template>
  <div id="app">
    <div class="wrap">

      <qrcode-pop :isPopup="isPopup" @showPopper="closeBtn">
        <h3>微信打开长按二维码关注公众号</h3>
        <div class="qrcode-img">
          <img src="../../assets/img/qrcode.jpg" class="qrcode">
        </div>
        <div class="close-btn" @click="closeBtn">关闭</div>
      </qrcode-pop>

    </div>
  </div>
</template>

<script>
import qrcodePop from '@/components/qrcodePop'

export default {
  components: {
    qrcodePop
  },
  data () {
    return {
      isPopup: false
    }
  },
  methods: {
    closeBtn () {
      this.isPopup = false;
    }
  }
}
</script>

<style scoped>

</style>
子组件使用props属性,接收父组件isPopup状态的传值,可以设定默认传值类型。代码如下:
<template>
	// 二维码弹框提示
	<div id="qrcodePop" class="qrcodePop" v-show="isPopup">
		<div class="qrcode-box">
			<slot></slot>
		</div>
		<div id="mask" @click="closeBtn"></div>
	</div>
</template>

<script>

export default {
	data () {
		return {
		}
	},
	props: {
		isPopup: Boolean
	},
	methods: {
		closeBtn () {
			this.$emit('showPopper');
		}
	}
}
</script>

<style scoped>
#mask {
	position: fixed;
	top: 0;
	left: 0;
	bottom: 0;
	right: 0;
	height: 100%;
	width: 100%;
	z-index: 9999;
	background: rgba(0, 0, 0, .7);
}
.qrcode-box {
	position: fixed;
	top: 50%;
	left: 50%;
	width: 6rem;
	height: 7rem;
	margin-top: -3.5rem;
	margin-left: -3rem;
	display: flex;
    justify-content: space-between;
    flex-direction: column;
	background: #fff;
	border-radius: .2rem;
	z-index: 10000;
	overflow: hidden;
    text-align: center;
}
.qrcode-box h3 {
	width: 100%;
	height: auto;
	padding: .2rem 0;
	font-size: .32rem;
	color: #fff;
	background: #fc0786;
	text-overflow: ellipsis;
    white-space: nowrap;
    overflow: hidden;
}
.qrcode-box img {
	width: 5.16rem;
	height: 5.16rem;
}
.qrcode-box .close-btn {
    width: 100%;
    height: auto;
    padding: .2265rem 0;
    font-size: .32rem;
    border-top: 1px solid #ddd;
    background: #f2f2f2;
}

.layer-cont {
	padding: .2rem .3rem 0 .3rem;
	line-height: .44rem;
    text-align: center;
}
.kouling-cont {
    position: relative;
    background: #fff4f8;
    padding: .2rem;
    margin: 0 auto;
    display: flex;
	align-items: center;
	justify-content: center;
}

#textarea {
	display: block;
    font-size: .24rem;
    width: 100%;
    height: 2.2rem;
    line-height: .28rem;
    color: #fc0786;
    background: #fff;
    resize: none;
    border: none;
  outline: none;
  overflow-x: hidden;
    word-wrap: break-word;
    word-break: break-all;
}
.better-change{
	display: flex;
	align-items: center;
	justify-content: space-around;
}
.onecopy {
	width: 50%;
	padding: .25rem .0;
    background: #f8285c;
    text-align: center;
    margin: 0 auto;
    color: #fff;
    cursor: pointer;
    border-top: 1px solid #ddd;
    font-size: .32rem;
}
.kouling-tips p {
	display: block;
    border-bottom: 1px dotted #e5e5e5;
    padding: .15rem 0;
    text-align: justify;
    font-size: .28rem;
}
.kouling-tips i {
	color: #dd514c;
}
.kouling-tips p.nber {
	border-bottom: none;
}
</style>
子组件传值给父组件,在父组件中定义方法名closeBtn,并在子组件上添加自定义事件名@showPopper,如下图:

在子组件中将this.$emit()方法放在closeBtn点击函数里面,来触发父组件事件传递isPopup状态值,如下图:

父子组件之间的传值已完成,最后再补充一下rem适配手机页面生效,需在每个Vue模板页面引入即可,代码如下:
<script>
import Export from '@/assets/js/export'

export default {
	data() {
		return  {}
	},
	methods: {},
	created () {
    	Export.rem(); // 调用rem手机页面适配方法
  	},
  	mounted () {}
  }
}
</script>
项目中涉及的功能点基本讲完,若需看整站效果或源代码请移步去github上查看或*载下**。附上地址:https://github.com/jackchen0120/woyouzhe
还包括更多实战项目哦!
