netty其实针对nio做了封装,其实最核心的就是BOOS线程和WORK线程。有人了解netty3 有人了解netty4,其实这2个差别并不大。其实netty就是高性能的事件驱动型的NIO框架。

(一)netty架构
这次要说netty3,目前dubbo,google,facebook的RPC框架都是基于netty3实现的。目前netty已经到5了。
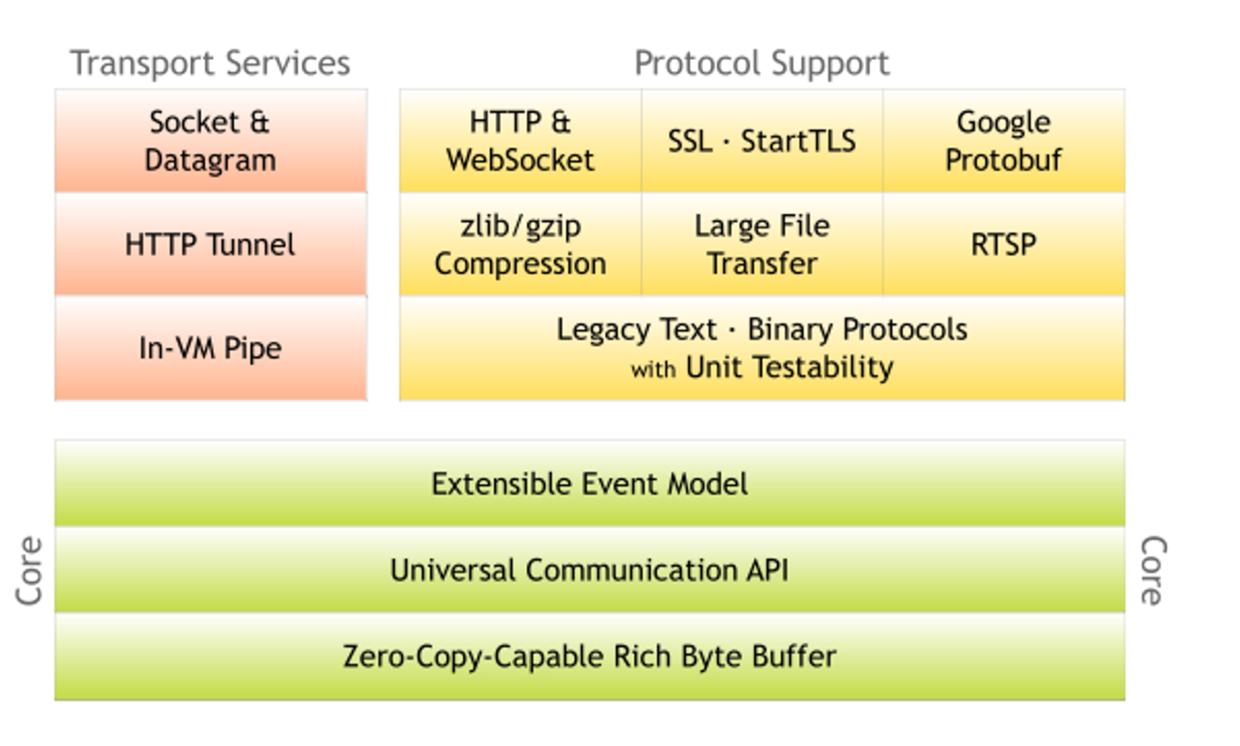
- 主要分为五個部分
1.Core是核心层,netty最以为傲的东西,Extensible Event Model可扩展的基于拦截器链式实现的。
2.Universal Communication API 统一的通信API,主要是对NIO,BIO统一的封装
3.Zero-Copy-Capable Rich Byte Buffer 0拷贝的
4.Transport Services 传输层服务
5.Protocol Support 应用层协议支持
- 模块组件
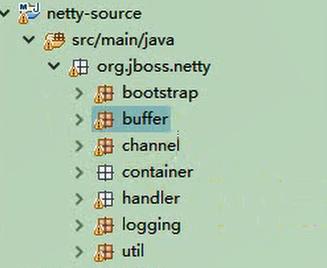
1.bootstrap Netty服务端及客户端启动类
2.buffer 缓冲相关,对NIO Buffer做了一些优化、封装
3.channel 处理客户端与服务端之间的连接通道
4.container 连接其他容器的代码,例如Spring
5.handler 实现协议编解码等附加功能
6.logging 日志
7.util工具类
- netty中的主从线程模型
使用EventLoop来处理连接上的读写事件,而一个连接上的所有请求都保证在一个EventLoop中被处理,一个EventLoop中只有一个Thread,所以也就实现了一个连接上的所有事件只会在一个线程中被执行。一个EventLoopGroup包含多个EventLoop,可以把一个EventLoop当做是Reactor线程模型中的一个线程。

举个例子吧:在Netty的里面有一个Boss,他开了一家公司(开启一个服务端口)对外提供业务服务,它手下有一群做事情的workers。Boss一直对外宣传自己公司提供的业务,并且接受(accept)有需要的客户(client),当一位客户找到Boss说需要他公司提供的业务,Boss便会为这位客户安排一个worker,这个worker全程为这位客户服务(read/write)。如果公司业务繁忙,一个worker可能会为多个客户进行服务。这就是Netty里面Boss和worker之间的关系。
Server.java
import java.net.InetSocketAddress;
import java.util.concurrent.ExecutorService;
import java.util.concurrent.Executors;
import org.jboss.netty.bootstrap.ServerBootstrap;
import org.jboss.netty.channel.ChannelPipeline;
import org.jboss.netty.channel.ChannelPipelineFactory;
import org.jboss.netty.channel.Channels;
import org.jboss.netty.channel.socket.nio.NioServerSocketChannelFactory;
import org.jboss.netty.handler.codec.string.StringDecoder;
import org.jboss.netty.handler.codec.string.StringEncoder;
/**
 * netty服务端
 * @author idig8.com
 */
public class Server {
 public static void main(String[] args) {
 // 服务类
 ServerBootstrap bootstrap = new ServerBootstrap();

 // boss线程,主要监听端口和获取worker线程及分配socketChannel给worker线程
 ExecutorService boss = Executors.newCachedThreadPool();
 // worker线程负责数据读写
 ExecutorService worker = Executors.newCachedThreadPool();

 // 设置niosocket工厂
 bootstrap.setFactory(new NioServerSocketChannelFactory(boss, worker));

 // 设置管道的工厂
 bootstrap.setPipelineFactory(new ChannelPipelineFactory() {

 @Override
 public ChannelPipeline getPipeline() throws Exception {
 ChannelPipeline pipeline = Channels.pipeline();
 // 管道过滤器
 pipeline.addLast("decoder", new StringDecoder());
 pipeline.addLast("encoder", new StringEncoder());
 pipeline.addLast("myServerMessageHandler", new MyServerMessageHandler());
 return pipeline;
 }
 });

 // 服务类绑定端口
 bootstrap.bind(new InetSocketAddress(7777));

 System.out.println("服务端启动...");

 }
}
处理的handler
import org.jboss.netty.channel.ChannelHandlerContext;
import org.jboss.netty.channel.ChannelStateEvent;
import org.jboss.netty.channel.ExceptionEvent;
import org.jboss.netty.channel.MessageEvent;
import org.jboss.netty.channel.SimpleChannelHandler;
/**
* 消息处理类
* @author idig8.com
*/
public class MyServerMessageHandler extends SimpleChannelHandler {
/**
* 接收消息
*/
@Override
public void messageReceived(ChannelHandlerContext ctx, MessageEvent e) throws Exception {
System.out.println("messageReceived");
String s = (String) e.getMessage();
System.out.println("服务端收到数据:"+s);
//回写数据给客户端
ctx.getChannel().write("hello...");
super.messageReceived(ctx, e);
}
/**
* 异常处理
*/
@Override
public void exceptionCaught(ChannelHandlerContext ctx, ExceptionEvent e) throws Exception {
System.out.println("exceptionCaught");
super.exceptionCaught(ctx, e);
}
/**
* 获取新连接事件
*/
@Override
public void channelConnected(ChannelHandlerContext ctx, ChannelStateEvent e) throws Exception {
System.out.println("channelConnected");
super.channelConnected(ctx, e);
}
/**
* 关闭通道的时候触发 (必须是链接已经建立)
*/
@Override
public void channelDisconnected(ChannelHandlerContext ctx, ChannelStateEvent e) throws Exception {
System.out.println("channelDisconnected");
super.channelDisconnected(ctx, e);
}
/**
* 通道关闭的时候触发
*/
@Override
public void channelClosed(ChannelHandlerContext ctx, ChannelStateEvent e) throws Exception {
System.out.println("channelClosed");
super.channelClosed(ctx, e);
}
}
处理流程
- 1.标记nio selector唤醒状态(wakeUp状态位,true有请求,false没有请求)
- 2.Selector(注册)
- 3.处理任务队列
- 4.处理自己的业务(客户端的读写请求等)

- dubbo底层

- netty启动一个服务所经过的流程
1.设置boss线程 和 worker线程,boss安排,worker干活,让他们入厂,准备由boss安排worker干活。
2.设置启动类参数,最重要的就是设置channel。
3.创建server对应的channel,创建各大组件,包括ChannelConfig,ChannelId,ChannelPipeline,ChannelHandler,Unsafe。
4.初始化server对应的channel,设置一些attr,option,以及设置子channel的attr,option,给server的channel添加新channel接入器,并出发addHandler,register等事件。
5.调用到jdk底层做端口绑定,并触发active事件,active触发的时候,真正做服务端口绑定。
PS:Netty是Java程序员进阶的必备神器。随着网站规模的不断扩大,系统并发访问量也越来越高,传统基于 Tomcat 等 Web 容器的垂直架构已经无法满足需求,需要拆分应用进行服务化,以提高开发和维护效率。从组网情况看,垂直的架构拆分之后,系统采用分布式部署,各个节点之间需要远程服务调用,高性能的 RPC 框架必不可少,Netty 作为异步高性能的通信框架,往往作为基础通信组件被这些 RPC 框架使用。
Java默认提供的序列化机制,需要序列化的Java对象只需要实现 Serializable / Externalizable 接口并生成序列化ID,这个类就能够通过 ObjectInput 和 ObjectOutput 序列化和反序列化。
源码:https://github.com/limingios/netFuture/tree/master/源码/『互联网架构』软件架构-io与nio线程模型reactor模型(上)(53)/nio

(三)序列化协议基础
目的就是把对象序列化成一堆字节数组,用于网络的传输,序列化存储到磁盘上面。
1.基础类型int在内存中的远生序列化
- Int类型序列化方式
大端序列
先写高位,在写低位
小端序列
先写低位,在写高位
- int 转 byte 是高位在前,低位在后
例如:int value =11。4个字节就是32位。
# value = 11的对应的32位,左边是高位 右边是低位
00000000 00000000 00000000 00001011 = 11
# 0xFF000000 对应的是
11111111 00000000 00000000 00000000
#value & 0xFF000000
00000000 00000000 00000000 00001011
& 11111111 00000000 00000000 00000000
= 00000000 00000000 00000000 00000000
#value & value & 0x00FF0000
00000000 00000000 00000000 00001011
& 00000000 11111111 00000000 00000000
= 00000000 00000000 00000000 00000000
= 00000000 00000000 00000000 00000000
#value & value & 0x0000FF00
00000000 00000000 00000000 00001011
& 00000000 00000000 11111111 00000000
= 00000000 00000000 00000000 00000000
= 00000000 00000000 00000000 00000000
#value & value & 0x000000FF
00000000 00000000 00000000 00001011
& 00000000 00000000 00000000 11111111
= 00000000 00000000 00000000 00001011
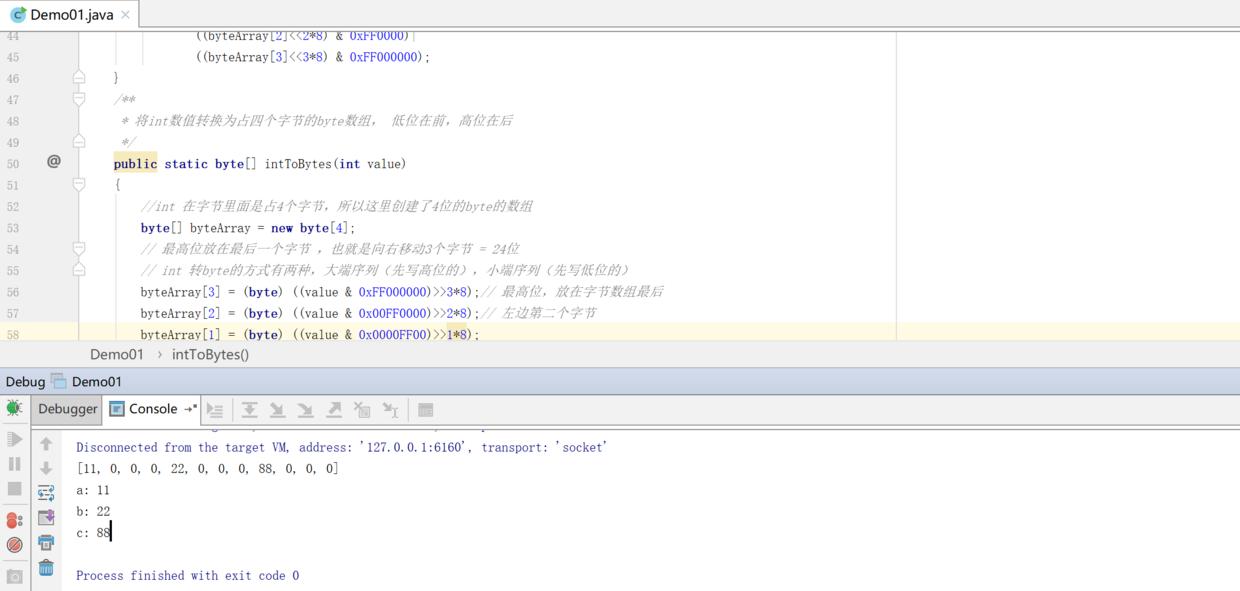
最后通过移位后的结果是byte数组[11,0,0,0]
byte 转 int 是低位在前,高位在后
跟上边是类似的,这里就不在说明了
# 通过 | 等于11
byteArray[0]&0xFF
(byteArray[1]<<1*8) & 0xFF00
(byteArray[2]<<2*8) & 0xFF0000
(byteArray[3]<<3*8) & 0xFF000000
源码:serial\base\serial\Demo01.java
package com.dig8.serial.base.serial;
import java.io.ByteArrayInputStream;
import java.io.ByteArrayOutputStream;
import java.util.Arrays;
/**
 * 原始int转byte数组
 * @author
 */
public class Demo01 {
 public static void main(String[] args) throws Exception {
 int a = 11;
 int b = 22;
 int c = 88;

 ByteArrayOutputStream os = new ByteArrayOutputStream();
 //os.write(a);// 为什么不用这个? 需要写入到磁盘中
 os.write(intToBytes(a));
 os.write(intToBytes(b));
 os.write(intToBytes(c));
 byte[] byteArray = os.toByteArray();
 System.out.println(Arrays.toString(byteArray));

 ByteArrayInputStream is = new ByteArrayInputStream(byteArray);
 byte[] aBytes = new byte[4];
 byte[] bBytes = new byte[4];
 byte[] cBytes = new byte[4];
 is.read(aBytes);
 is.read(bBytes);
 is.read(cBytes);
 System.out.println("a: " + bytesToInt(aBytes));
 System.out.println("b: " + bytesToInt(bBytes));
 System.out.println("c: " + bytesToInt(cBytes));
 }

 /**
 * byte数组转int; 低位在前,高位在后
 */
 public static int bytesToInt(byte[] byteArray) {
 return (byteArray[0]&0xFF)|
 ((byteArray[1]<<1*8) & 0xFF00)|
 ((byteArray[2]<<2*8) & 0xFF0000)|
 ((byteArray[3]<<3*8) & 0xFF000000);
 }
 /**
 * 将int数值转换为占四个字节的byte数组, 低位在前,高位在后
 */
 public static byte[] intToBytes(int value)
 {
 byte[] byteArray = new byte[4];
 // 最高位放在最后一个字节 ,也就是向右移动3个字节 = 24位
 byteArray[3] = (byte) ((value & 0xFF000000)>>3*8);// 最高位,放在字节数组最后
 byteArray[2] = (byte) ((value & 0x00FF0000)>>2*8);// 左边第二个字节
 byteArray[1] = (byte) ((value & 0x0000FF00)>>1*8);
 byteArray[0] = (byte) ((value & 0x000000FF)); // 最低位
 //[11,0,0,0]
 return byteArray;
 }
}
2.基于nio的序列化
通过jdk自带的nio进行序列化,可以看到几行代码就搞定了
源码:Demo02.java
import java.nio.ByteBuffer;
import java.util.Arrays;
/**
 * nio 序列化
 * @author
 */
public class Demo02 {
 public static void main(String[] args) {
 int a = 11;
 int b = 22;

 // 序列化
 ByteBuffer buffer = ByteBuffer.allocate(8);
 buffer.putInt(a);
 buffer.putInt(b);
// buffer.putInt(2);
 byte[] array = buffer.array();
 System.out.println(Arrays.toString(buffer.array()));

 // 反序列化
 ByteBuffer bb = ByteBuffer.wrap(array);
 System.out.println("a: " + bb.getInt());
 System.out.println("b: " + bb.getInt());
 }
}

- nio的buffer是固定死的,能够解决复杂的运算,但是不能动态的扩容。
设置长度111,结果int转的byte长达111位

设置长度为1

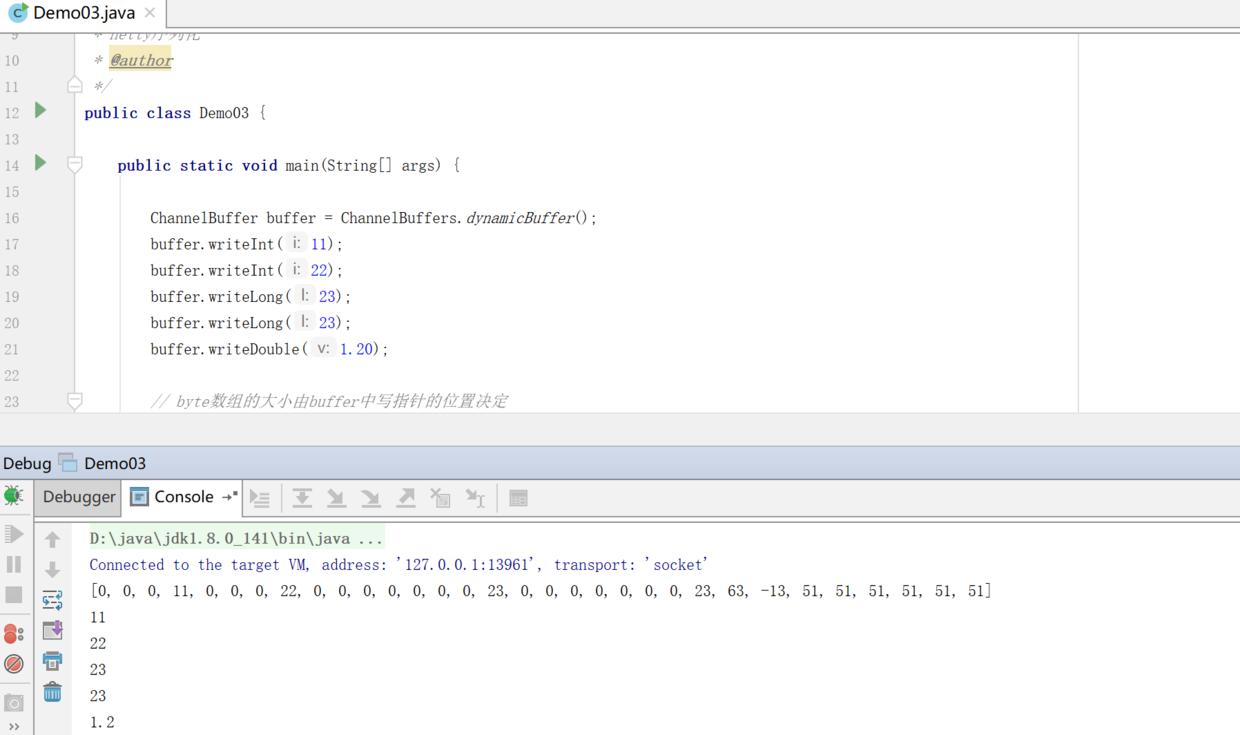
3.基于netty的序列化
netty无需进行长度确定,byte数组的大小由buffer中写指针的位置决定。
源码: Demo3.java
import java.util.Arrays;
import org.jboss.netty.buffer.ChannelBuffer;
import org.jboss.netty.buffer.ChannelBuffers;
/**
 * netty序列化
 * @author
 */
public class Demo03 {
 public static void main(String[] args) {
 ChannelBuffer buffer = ChannelBuffers.dynamicBuffer();
 buffer.writeInt(11);
 buffer.writeInt(22);
 buffer.writeLong(23);
 buffer.writeLong(23);
 buffer.writeDouble(1.20);
 // byte数组的大小由buffer中写指针的位置决定
 // 往ChannelBuffer中写数据的时候,这个写指针就会移动写的数据的长度
 byte[] bytes = new byte[buffer.writerIndex()];
 buffer.readBytes(bytes); // 序列化
 System.out.println(Arrays.toString(bytes));

 // 反序列化
 ChannelBuffer wrappedBuffer = ChannelBuffers.wrappedBuffer(bytes);
 System.out.println(wrappedBuffer.readInt());
 System.out.println(wrappedBuffer.readInt());
 System.out.println(wrappedBuffer.readLong());
 System.out.println(wrappedBuffer.readLong());
 System.out.println(wrappedBuffer.readDouble());
 }
}
(四)对象序列化
4.1Java原始对象序列化
- ObjectInputStream 和 ObjectOutputStream
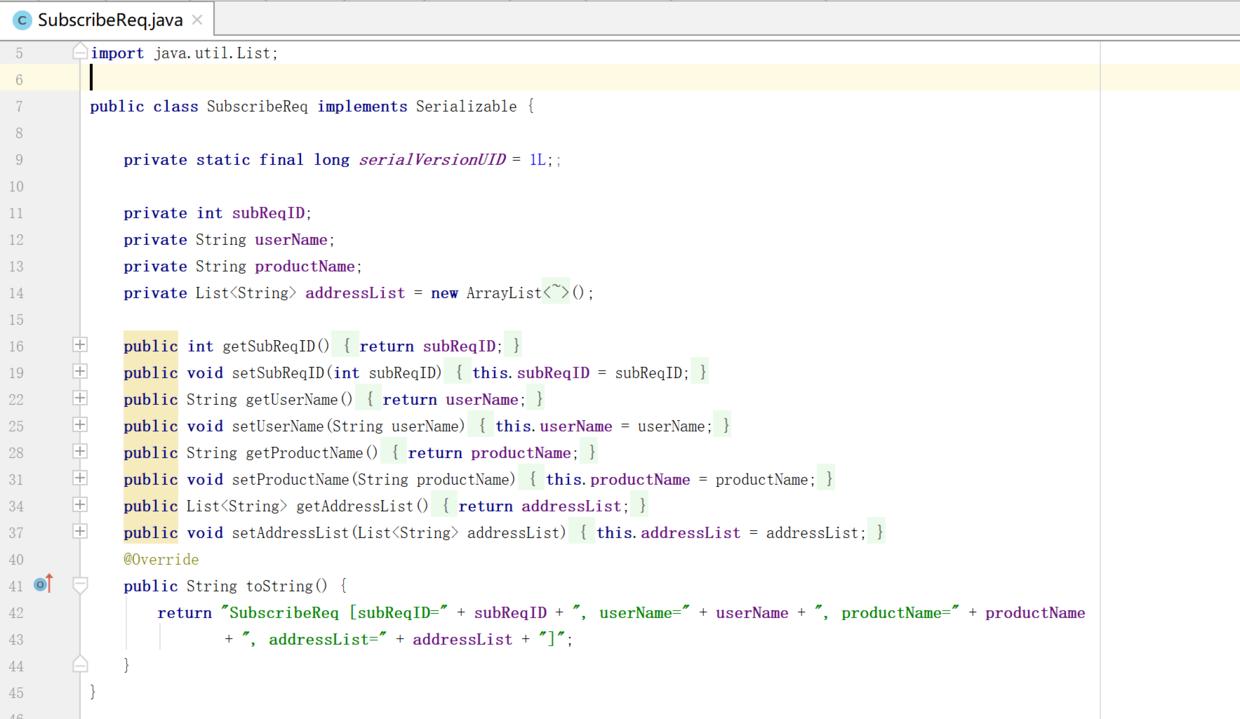
源码:SubscribeReq.java 对象
import java.io.Serializable;
import java.util.ArrayList;
import java.util.List;
public class SubscribeReq implements Serializable {
 private static final long serialVersionUID = 1L;;

 private int subReqID;
 private String userName;
 private String productName;
 private List<String> addressList = new ArrayList<String>();

 public int getSubReqID() {
 return subReqID;
 }
 public void setSubReqID(int subReqID) {
 this.subReqID = subReqID;
 }
 public String getUserName() {
 return userName;
 }
 public void setUserName(String userName) {
 this.userName = userName;
 }
 public String getProductName() {
 return productName;
 }
 public void setProductName(String productName) {
 this.productName = productName;
 }
 public List<String> getAddressList() {
 return addressList;
 }
 public void setAddressList(List<String> addressList) {
 this.addressList = addressList;
 }
 @Override
 public String toString() {
 return "SubscribeReq [subReqID=" + subReqID + ", userName=" + userName + ", productName=" + productName
 + ", addressList=" + addressList + "]";
 }
}
java原生的序列化
import java.io.ByteArrayInputStream;
import java.io.ByteArrayOutputStream;
import java.io.ObjectInputStream;
import java.io.ObjectOutputStream;
import java.util.ArrayList;
import java.util.Arrays;
import java.util.List;
/**
 * java原始序列化:
 * ObjectOutputStream 序列化
 * ObjectInputStream 反序列化
 *
 * @author idig8.com
 */
public class JavaSeri {
 public static void main(String[] args) throws Exception{
 // 序列化
 byte[] result = serialize();
 System.out.println(Arrays.toString(result));

 // 反序列化
 SubscribeReq req = deserialize(result);
 System.out.println(req.getSubReqID());
 System.out.println(req.getUserName());
 System.out.println(req.getProductName());
 System.out.println(req.getAddressList().get(0));
 System.out.println(req.getAddressList().get(1));
 }

 // 序列化
 public static byte[] serialize() throws Exception{
 SubscribeReq req = new SubscribeReq();

 req.setSubReqID(1);
 req.setUserName("abc");
 req.setProductName("netty");

 List<String> addressList = new ArrayList<String>();
 addressList.add("郑州");
 addressList.add("开封");
 req.setAddressList(addressList);

 ByteArrayOutputStream baos = new ByteArrayOutputStream();
 ObjectOutputStream objectOutputStream = new ObjectOutputStream(baos);
 // 把SubscribeReq对象写入ByteArrayOutputStream中
 objectOutputStream.writeObject(req);
 // 从ByteArrayOutputStream 获取序列化好的字节数组
 byte[] byteArray = baos.toByteArray();
 return byteArray ;
 }

 // 反序列化
 public static SubscribeReq deserialize(byte[] byteArray) throws Exception{
 ObjectInputStream objectOutputStream = new ObjectInputStream(
 new ByteArrayInputStream(byteArray));
 SubscribeReq req = (SubscribeReq)objectOutputStream.readObject();
 return req;
 }
}

在RPC通信中重点需要关注的2个点
1.码流的大小,也就是解析后的二进制的大小,很明显原生的jdk序列化,字符长度很长,下面的滚动条都很长。数据越多,传输的带宽越大。在项目开发中内网通信的带宽都是固定的,你占的多了,就影响其他人使用带宽。
2.编解码性能,编解码速度越快,肯定就越好。
4.2protobuf序列化
- protobuf
https://github.com/protocolbuffers/protobuf

- 介绍
Protocol Buffers 是一种轻便高效的结构化数据存储格式,可以用于结构化数据串行化,或者说序列化。它很适合做数据存储或 RPC 数据交换格式。可用于通讯协议、数据存储等领域的语言无关、平台无关、可扩展的序列化结构数据格式。
- 使用
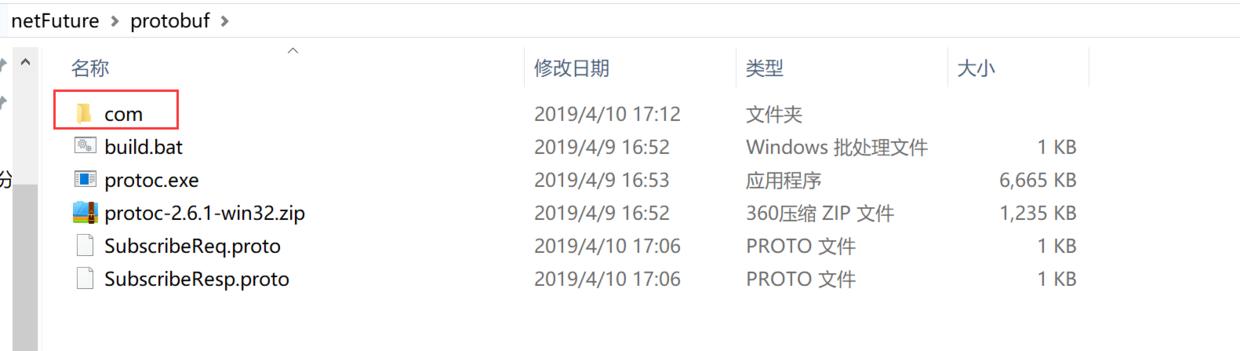
源码:https://github.com/limingios/netFuture/tree/master/protobuf
1.同级目录下编写文件
后缀proto,具体的proto这里就不介绍了,可以百度搜下

2.双击build.bat 同级目录就会根据proto,生成对应的java代码
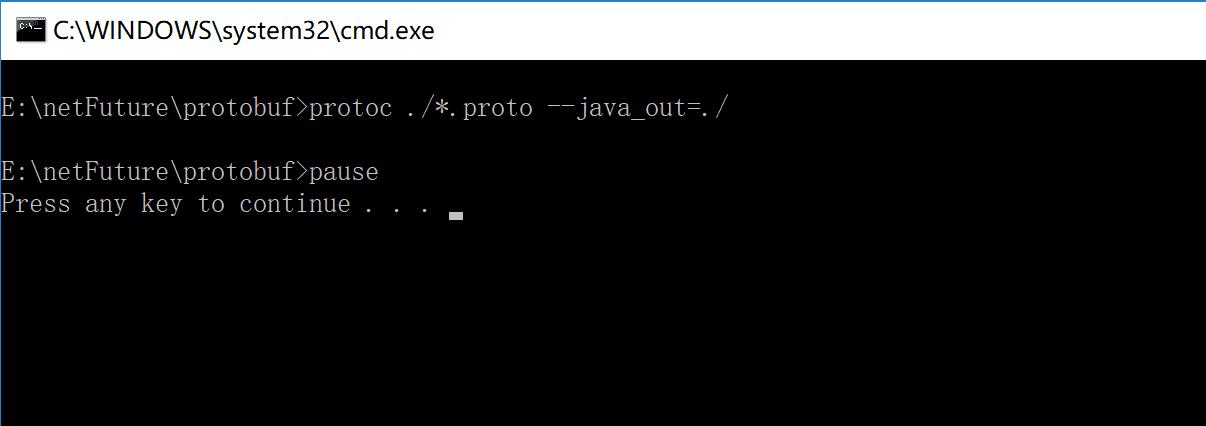

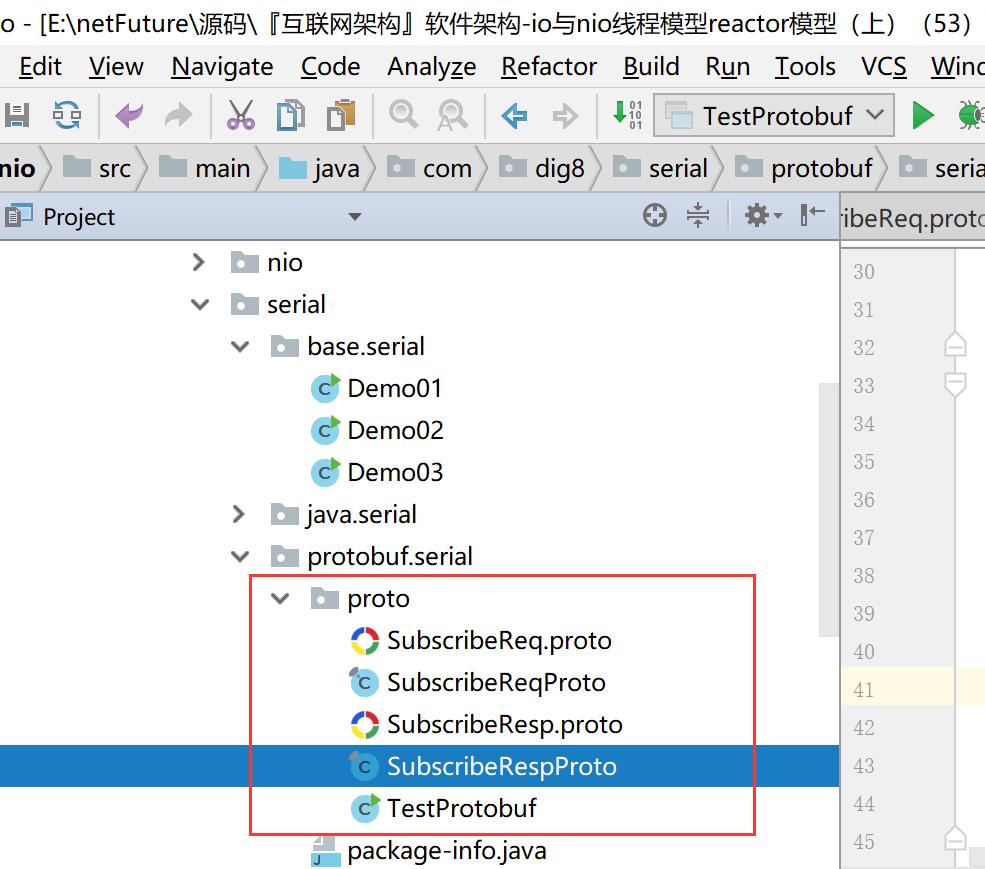
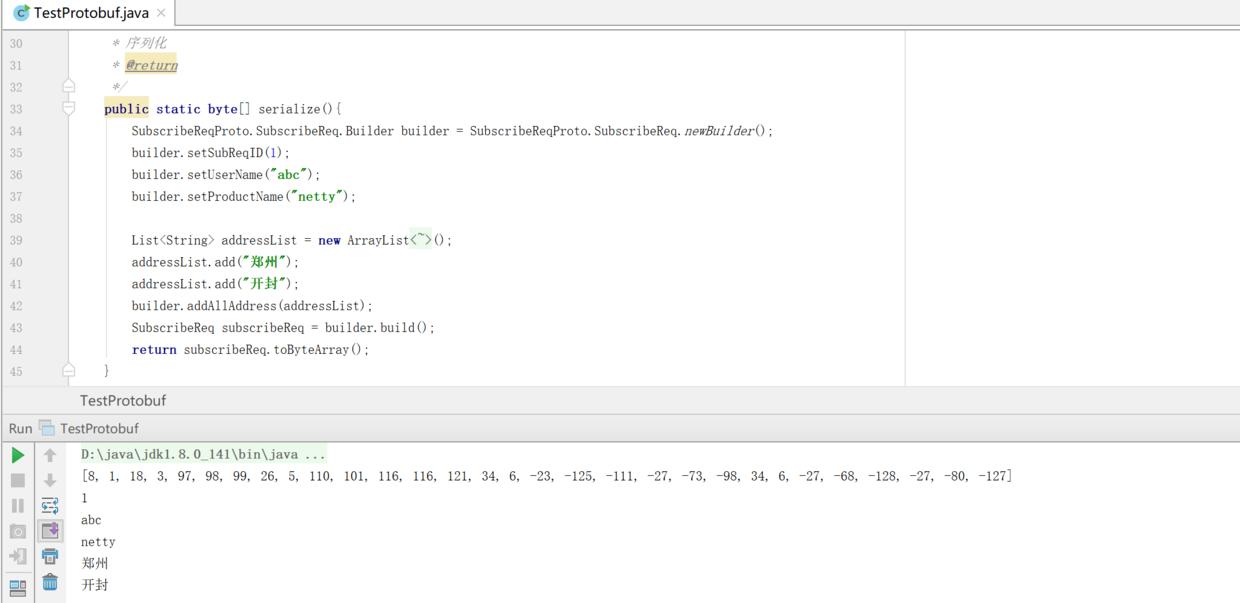
3.运行TestProtobuf
/**
 *
 */
package com.dig8.serial.protobuf.serial.proto;
import java.util.ArrayList;
import java.util.Arrays;
import java.util.List;
import com.google.protobuf.InvalidProtocolBufferException;
import com.dig8.serial.protobuf.serial.proto.SubscribeReqProto.SubscribeReq;
/**
 * @author
 */
public class TestProtobuf {
 public static void main(String[] args) throws InvalidProtocolBufferException {
 byte[] result = serialize();
 System.out.println(Arrays.toString(result));

 SubscribeReq req = deserialize(result);
 System.out.println(req.getSubReqID());
 System.out.println(req.getUserName());
 System.out.println(req.getProductName());
 System.out.println(req.getAddress(0));
 System.out.println(req.getAddress(1));
 }
 /**
 * 序列化
 * @return
 */
 public static byte[] serialize(){
 SubscribeReqProto.SubscribeReq.Builder builder = SubscribeReqProto.SubscribeReq.newBuilder();
 builder.setSubReqID(1);
 builder.setUserName("abc");
 builder.setProductName("netty");

 List<String> addressList = new ArrayList<String>();
 addressList.add("郑州");
 addressList.add("开封");
 builder.addAllAddress(addressList);
 SubscribeReq subscribeReq = builder.build();
 return subscribeReq.toByteArray();
 }

 /**
 * 反序列化
 * @return
 * @throws InvalidProtocolBufferException
 */
 public static SubscribeReq deserialize(byte[] bytes) throws InvalidProtocolBufferException{
 SubscribeReq result = SubscribeReq.parseFrom(bytes);
 return result;
 }
}
有老铁说用maven 插件的形式将proto生成java,千万不建议这么弄很熬时间,麻烦死,我这里也不说了,还是用我提供的源码把编辑好一下就生成了。
- 同样的内容 对比java和proto生成的字节数组
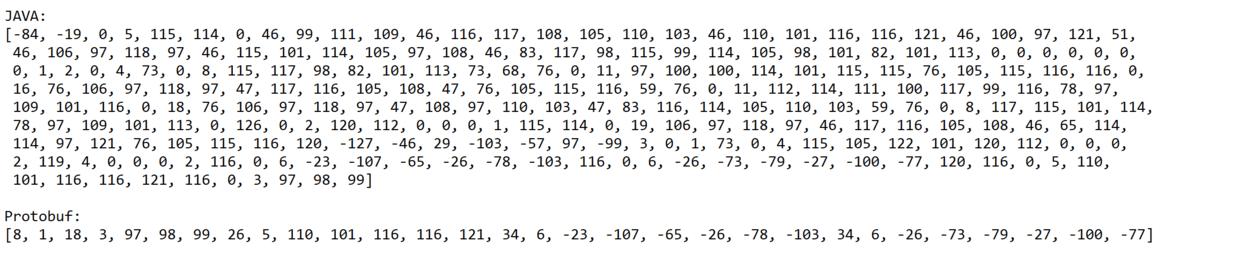
可以看出来protobuff的效果太明显了,java是protobuff的6倍。多占用了这么多带宽。在业务系统比较繁忙的系统来说,占用流量就是占用钱。
protobuf占用 1~5个字节
原理:值越小的数字,使用越少的字节数表示
作用:通过减少表示数字的字节数从而进行数据压缩
(五)Netty+Protobuf 测试
- 源码:https://github.com/limingios/netFuture/tree/master/源码/『互联网架构』软件架构-io与nio线程模型reactor模型(上)(53)/nio
- 这个package com.dig8.serial.protobuf.serial.nettyprotobuf 包下。

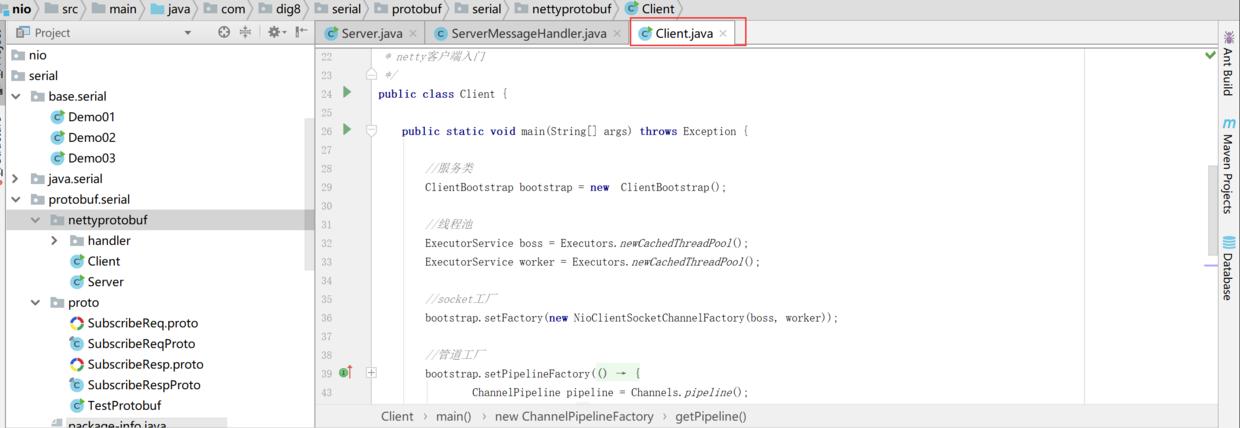
源码里面有注释,其实不复杂。看看就懂了。
PS:protobuf确实很强大,google的开源项目里面基本都有它。