上篇文件介绍了windows环境下安装elasticsearch,连接:windows安装elasticsearch,本节介绍es和kibana设置密码,加强安全。
1.修改配置文件,本文以Elasticsearch 6.8为样例,
修改elasticsearch-6.8.8\config\elasticsearch.yml,编辑打开添加
xpack.security.enabled: true

重新启动elasticsearch,启动成功后,访问http://127.0.0.1:9200/
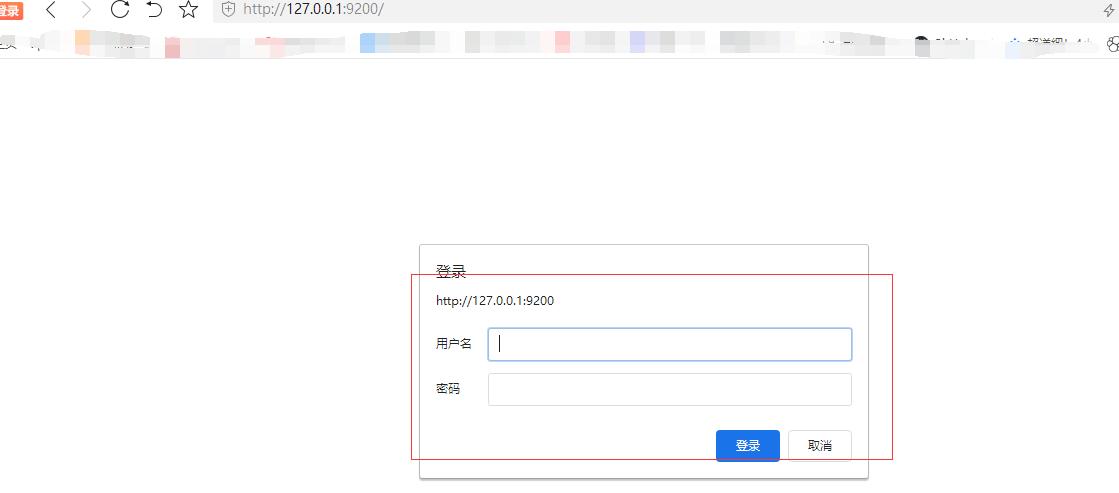
可以看到需要登录了
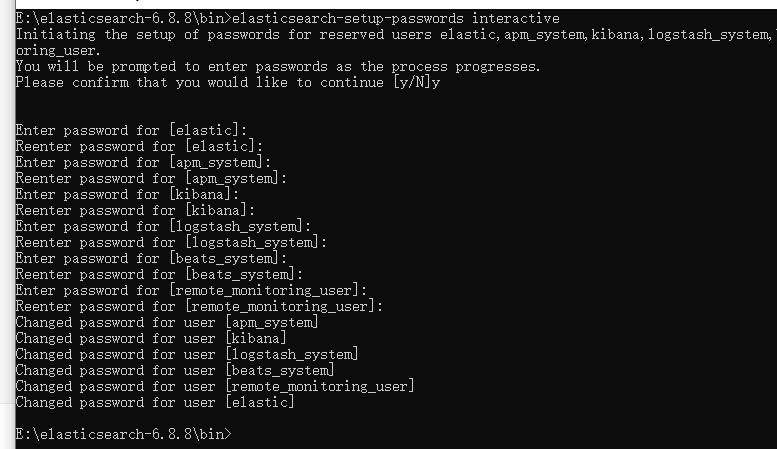
2.打开命令窗口,进入到es的bin目录,输入
elasticsearch-setup-passwords interactive
依次对系统自带的用户设置密码,
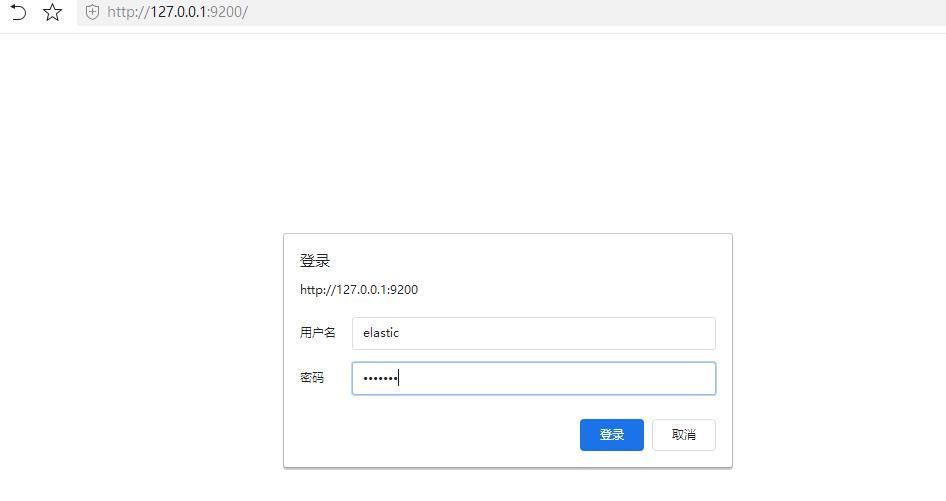
到此密码设置ok,输入用户名和密码登录,成功登录
3.由于es设置了密码,kibana也需要登录了
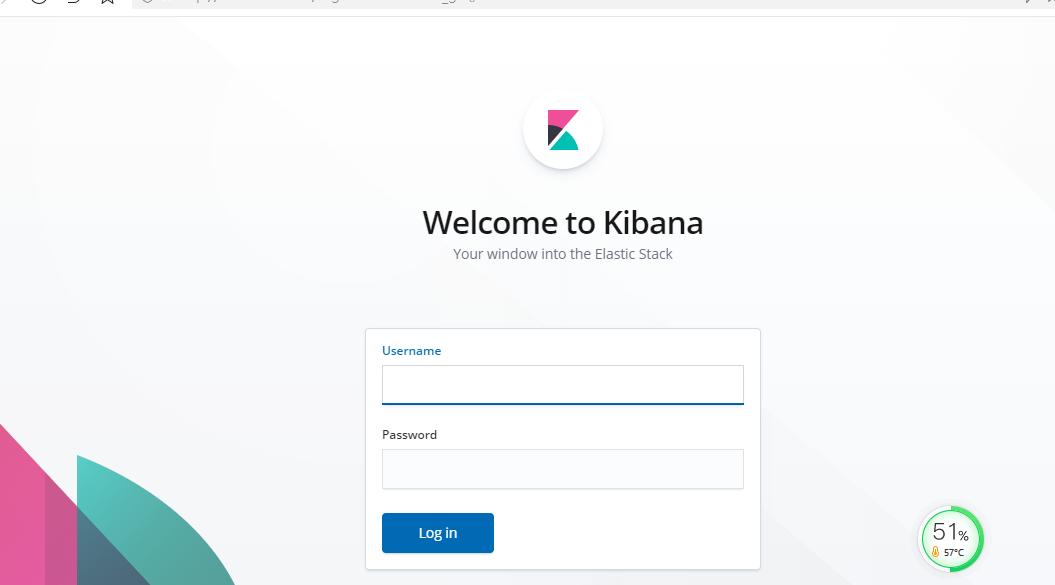
打开kibana.yml
在文件中添加
elasticsearch.username: "kibana"
elasticsearch.password: "你的密码"
关闭重新启动kibana,再次访问http://127.0.01:5601/,输入用户名和密码登录
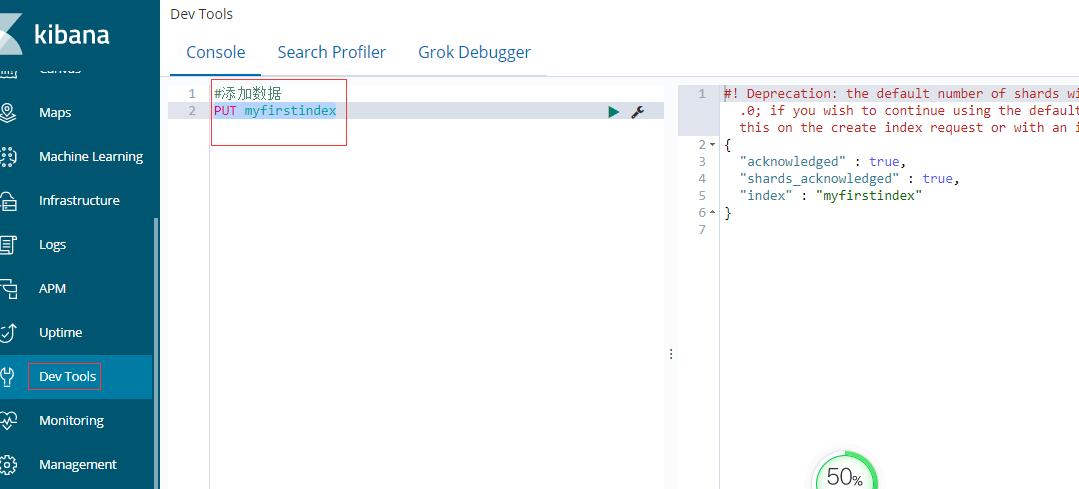
点击Dev Tools菜单操作es
4.1新增索引,es6后类型只支持_doc,默认类型就是_doc,也不允许修改
1.新增索引
PUT myfirstindex
{
  "settings":{
    "number_of_shards":"3",#分片数
	"number_of_replicas" : "1",#副本个数
    "index.refresh_interval":"1s"#数据刷新间隔
  }
}
2.设置别名:大厂生产中读取es数据都是读取es别名,方便无缝切换
---创建别名
POST /_aliases
{
  "actions": [
    {
      "add": {
        "index": "myfirstindex",
        "alias": "myfirstindex_alias"
      }
    }
  ]
}
3.设置mapping: 对应关系型数据库中的字段类型,es字段类型丰富这里不在赘述
PUT myfirstindex/_mapping/_doc
{
   "properties" : {
          "creaTime" : {
            "type" : "date",
            "format" : "yyyy-MM-dd HH:mm:ss||yyyy-MM-dd||epoch_millis"
          },
          "Name" : {
            "type" : "text"
          },
          "age" : {
            "type" : "long"
          },
          "live" : {
            "type" : "boolean"
          }
    }

}
4.查看索引情况
GET  myfirstindex
4.2新增数据
PUT myfirstindex/_doc/1
{
  "Name":"tom",
  "age":30,
  "live":true,
  "creaTime":"2026-03-17T09:37:00+00:00"
}

PUT myfirstindex/_doc/2
{
  "Name":"lili",
  "age":32,
  "live":false,
  "creaTime":"2026-03-17T09:37:00+00:00"
}
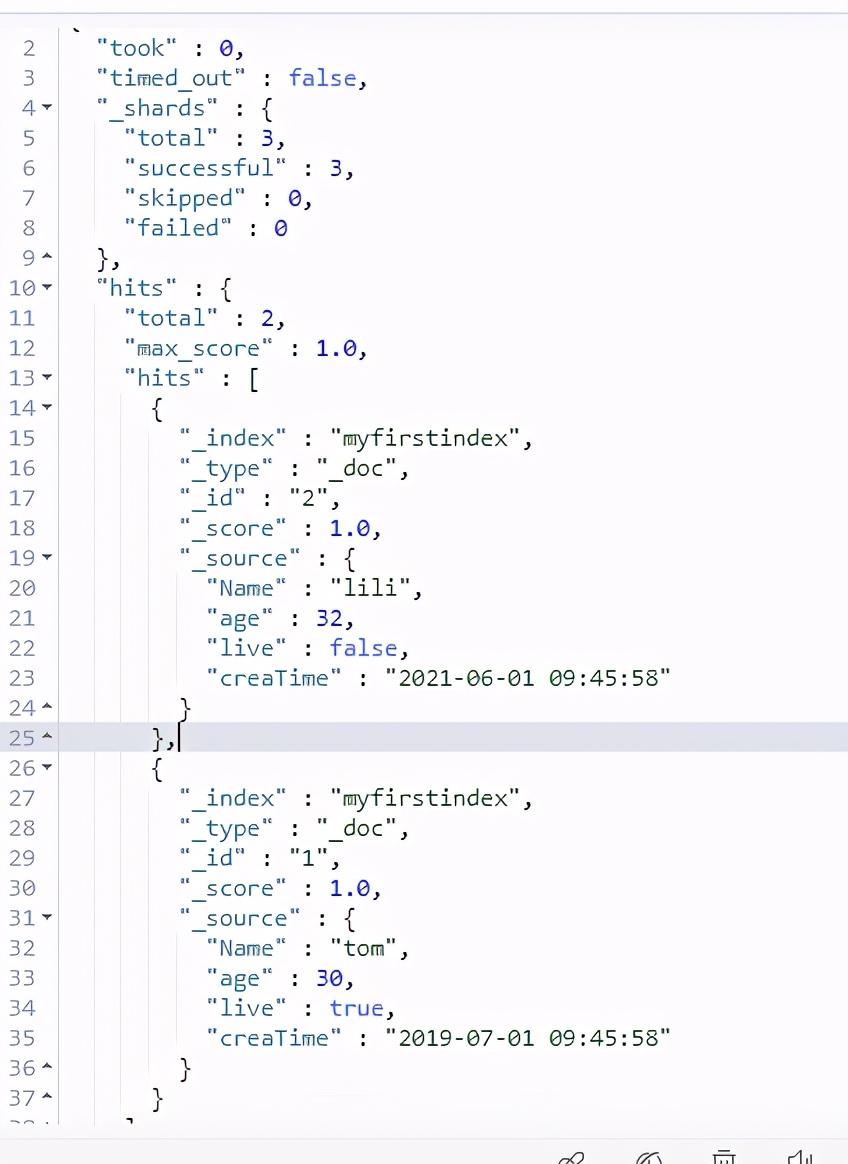
4.3查看数据
GET  myfirstindex/_search
{
  "query": {
    "match_all": {}
  }
}
响应结果
4.4修改数据把tom的年龄修改为50
POST myfirstindex/_doc/1/_update
{
  "doc":{
    "Name":50
  }
}
查看结果

4.5删除,删除id为2的name为lili的数据
1.根据主键删除
DELETE myfirstindex/_doc/1
2.根据查询条件删除
POST myfirstindex/_delete_by_query
{
  "query": {
   "match": {
      "Name": "lili"
    }
  }

}
以上es简单操作就到这里了