一、导读
在Qt开发中,习惯使用Qt Designer来对界面中的组成元素进行布局和设计。当我们使用鼠标点击一个界面控件后,右键单击,在弹出的菜单中会有两个选项: 放在前面 和 放在后面 。如下图所示:
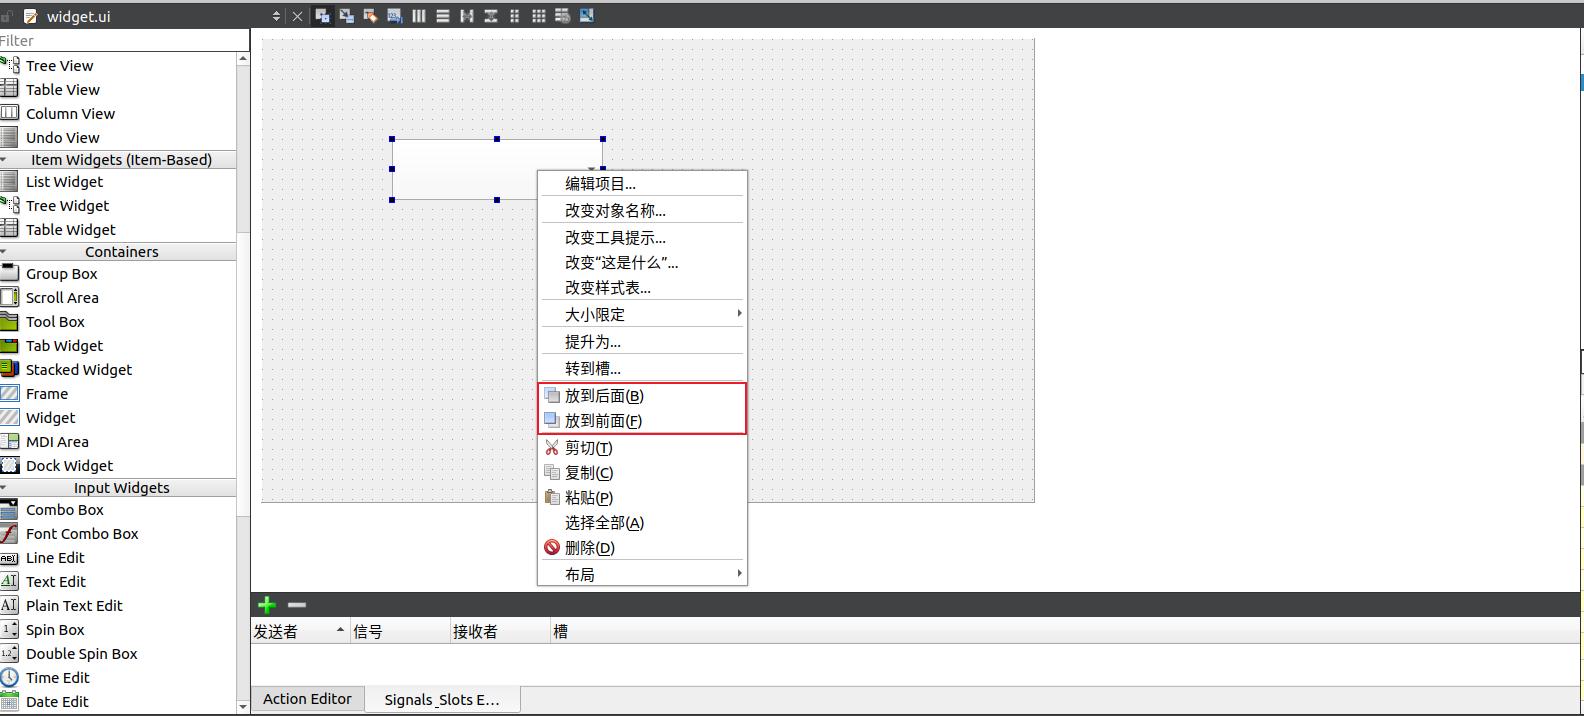
这两个选项对于界面控件来说,有什么作用呢?在实际开发过程中,哪些情况下会使用到这两个选项呢?其背后的机制又是什么呢?文本将一探究竟。
二、探秘开始
从字面意思上理解,则是当两个控件出现了重叠,这时候就需要考虑哪个控件在前面,哪个控件在后面。假如一个QWidget中包含了一个QLabel(用于显示文本)和一个QLineEdit(用于用户输入文本):

当他们两个不相遇的情况下,那一切都好说。如果把他们移动到一起(几乎完全重叠),这时候就成了下面的样子:
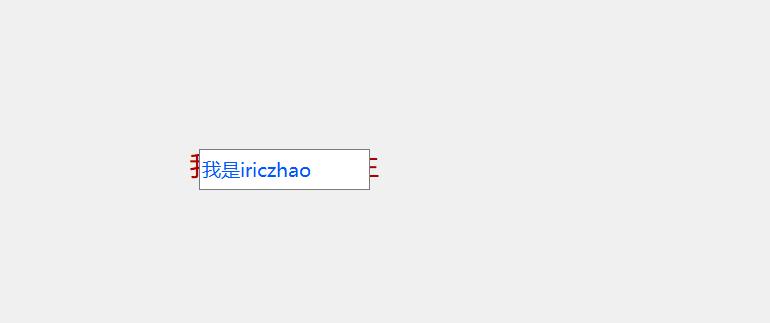
很明显,QLineEdit在前面清晰可见,边框后面还看得见Qlabel边缘部分的文字信息。
如果将QLineEdit放到后面,则会出现下面的效果:

能完整看见QLabel的文字信息,也能看见QLineEdit输入边框,且能正常输入文字。
综上,当两个控件重叠后,对控件设置放在前面和放在后面在界面显示上会出现不同的效果。
(2-1)实际应用场景
在实际Qt应用开发中,利用这一机制,可以组合实现很多效果,例如如果想在一张局部背景图上放置一个下拉选项框,使用QLabel+QComboxBox实现,如果不设置控件的显示次序,那么设置的背景图片则会将QComboxBox遮盖住,这时候就需要将QComboxBox放到前面,然后下图所示的效果才是预期效果:

综上, 放到前面 和 放到后面 两个选项在应用界面贴图开发的时候会经常使用到。
(2-2)背后的机制
在这篇文章《玩Qt,这三种使用ui文件的方式不得不知!)》中,写到了界面描述文件 xxx.ui在编译构建过程中,会被uic读取,然后生成C++代码,生成的代码位于ui_xxx.h中。假如一个QWidget中包含了一个QComboxBox和一个QLabel(用于设置一张背景图),如下图所示:

如果没有设置 放到前面 或者 放到后面 ,编译生成的C++代码如下:
#ifndef UI_WIDGET_H
#define UI_WIDGET_H

#include <QtCore/QVariant>
#include <QtWidgets/QApplication>
#include <QtWidgets/QComboBox>
#include <QtWidgets/QLabel>
#include <QtWidgets/QWidget>

QT_BEGIN_NAMESPACE

class Ui_Widget
{
public:
    QComboBox *comboBox;
    QLabel *label_2;

    void setupUi(QWidget *Widget)
    {
        if (Widget->objectName().isEmpty())
            Widget->setObjectName(QString::fromUtf8("Widget"));
        Widget->resize(770, 493);
        comboBox = new QComboBox(Widget);
        comboBox->addItem(QString());
        comboBox->addItem(QString());
        comboBox->addItem(QString());
        comboBox->addItem(QString());
        comboBox->setObjectName(QString::fromUtf8("comboBox"));
        comboBox->setGeometry(QRect(670, 30, 87, 26));
        label_2 = new QLabel(Widget);
        label_2->setObjectName(QString::fromUtf8("label_2"));
        label_2->setGeometry(QRect(0, 0, 773, 91));

        retranslateUi(Widget);

        QMetaObject::connectSlotsByName(Widget);
    } // setupUi

    void retranslateUi(QWidget *Widget)
    {
        Widget->setWindowTitle(QCoreApplication::translate("Widget", "Widget", nullptr));
        comboBox->setItemText(0, QCoreApplication::translate("Widget", "1", nullptr));
        comboBox->setItemText(1, QCoreApplication::translate("Widget", "2", nullptr));
        comboBox->setItemText(2, QCoreApplication::translate("Widget", "3", nullptr));
        comboBox->setItemText(3, QCoreApplication::translate("Widget", "4", nullptr));

        label_2->setText(QCoreApplication::translate("Widget", "TextLabel", nullptr));
    } // retranslateUi

};

namespace Ui {
    class Widget: public Ui_Widget {};
} // namespace Ui

QT_END_NAMESPACE

#endif // UI_WIDGET_H
此时 QLabel背景图将覆盖QComboxBox下拉框,不是想要的效果。这时候要么将QLabel放到后面,或者将QComboxBox放到前面,那么生成的C++代码如下:
#ifndef UI_WIDGET_H
#define UI_WIDGET_H

#include <QtCore/QVariant>
#include <QtWidgets/QApplication>
#include <QtWidgets/QComboBox>
#include <QtWidgets/QLabel>
#include <QtWidgets/QWidget>

QT_BEGIN_NAMESPACE

class Ui_Widget
{
public:
    QComboBox *comboBox;
    QLabel *label_2;

    void setupUi(QWidget *Widget)
    {
        if (Widget->objectName().isEmpty())
            Widget->setObjectName(QString::fromUtf8("Widget"));
        Widget->resize(770, 493);
        comboBox = new QComboBox(Widget);
        comboBox->addItem(QString());
        comboBox->addItem(QString());
        comboBox->addItem(QString());
        comboBox->addItem(QString());
        comboBox->setObjectName(QString::fromUtf8("comboBox"));
        comboBox->setGeometry(QRect(670, 30, 87, 26));
        label_2 = new QLabel(Widget);
        label_2->setObjectName(QString::fromUtf8("label_2"));
        label_2->setGeometry(QRect(0, 0, 773, 91));
        label_2->raise();
        comboBox->raise();

        retranslateUi(Widget);

        QMetaObject::connectSlotsByName(Widget);
    } // setupUi

    void retranslateUi(QWidget *Widget)
    {
        Widget->setWindowTitle(QCoreApplication::translate("Widget", "Widget", nullptr));
        comboBox->setItemText(0, QCoreApplication::translate("Widget", "1", nullptr));
        comboBox->setItemText(1, QCoreApplication::translate("Widget", "2", nullptr));
        comboBox->setItemText(2, QCoreApplication::translate("Widget", "3", nullptr));
        comboBox->setItemText(3, QCoreApplication::translate("Widget", "4", nullptr));

        label_2->setText(QCoreApplication::translate("Widget", "TextLabel", nullptr));
    } // retranslateUi

};

namespace Ui {
    class Widget: public Ui_Widget {};
} // namespace Ui

QT_END_NAMESPACE

#endif // UI_WIDGET_H
对比两种方式下生成的代码,发现多出了以下两行:
label_2->raise();
comboBox->raise();
raise()是QWidget提供的一个槽函数,用于将小部件提升到父小部件堆栈的顶部,调用这个函数后,小部件将在任何重叠的兄弟小部件的前面。与之对应的还有一个槽函数:lower(),将小部件降低到父小部件堆栈的底部。调用后,小部件将在任何重叠的兄弟小部件的后面(因此被遮蔽)。
综上,在Qt Designer中设置的放到前面或者放到后面操作,本质上则是uic生成了调用raise函数的代码实现的。